

Creating a survey
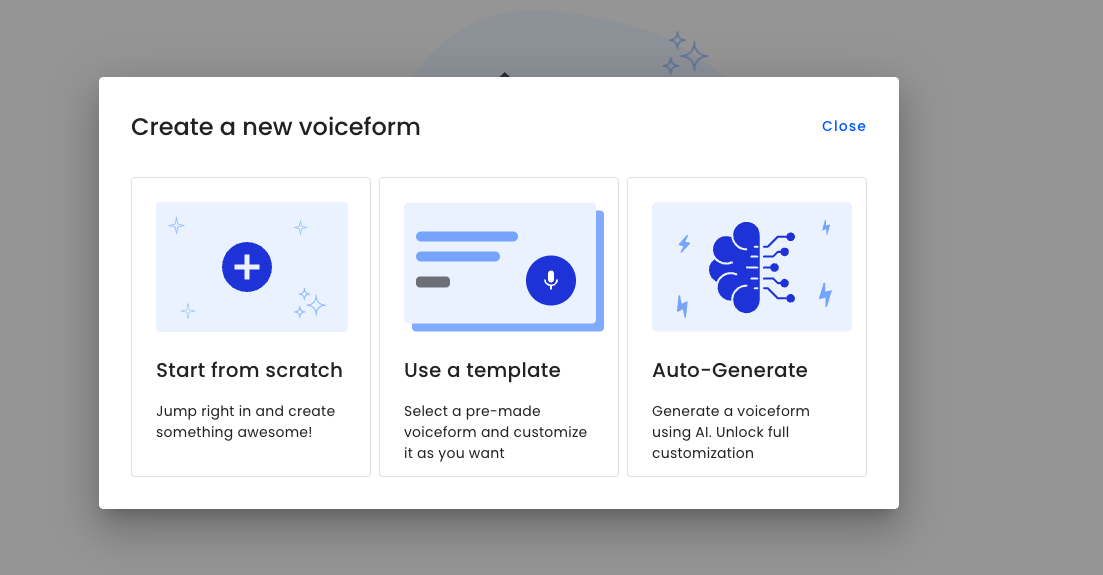
There are three options for creating a Voiceform survey. The first option is to start from scratch. The second option is to use a premade template. The third option is to generate a survey using AI.
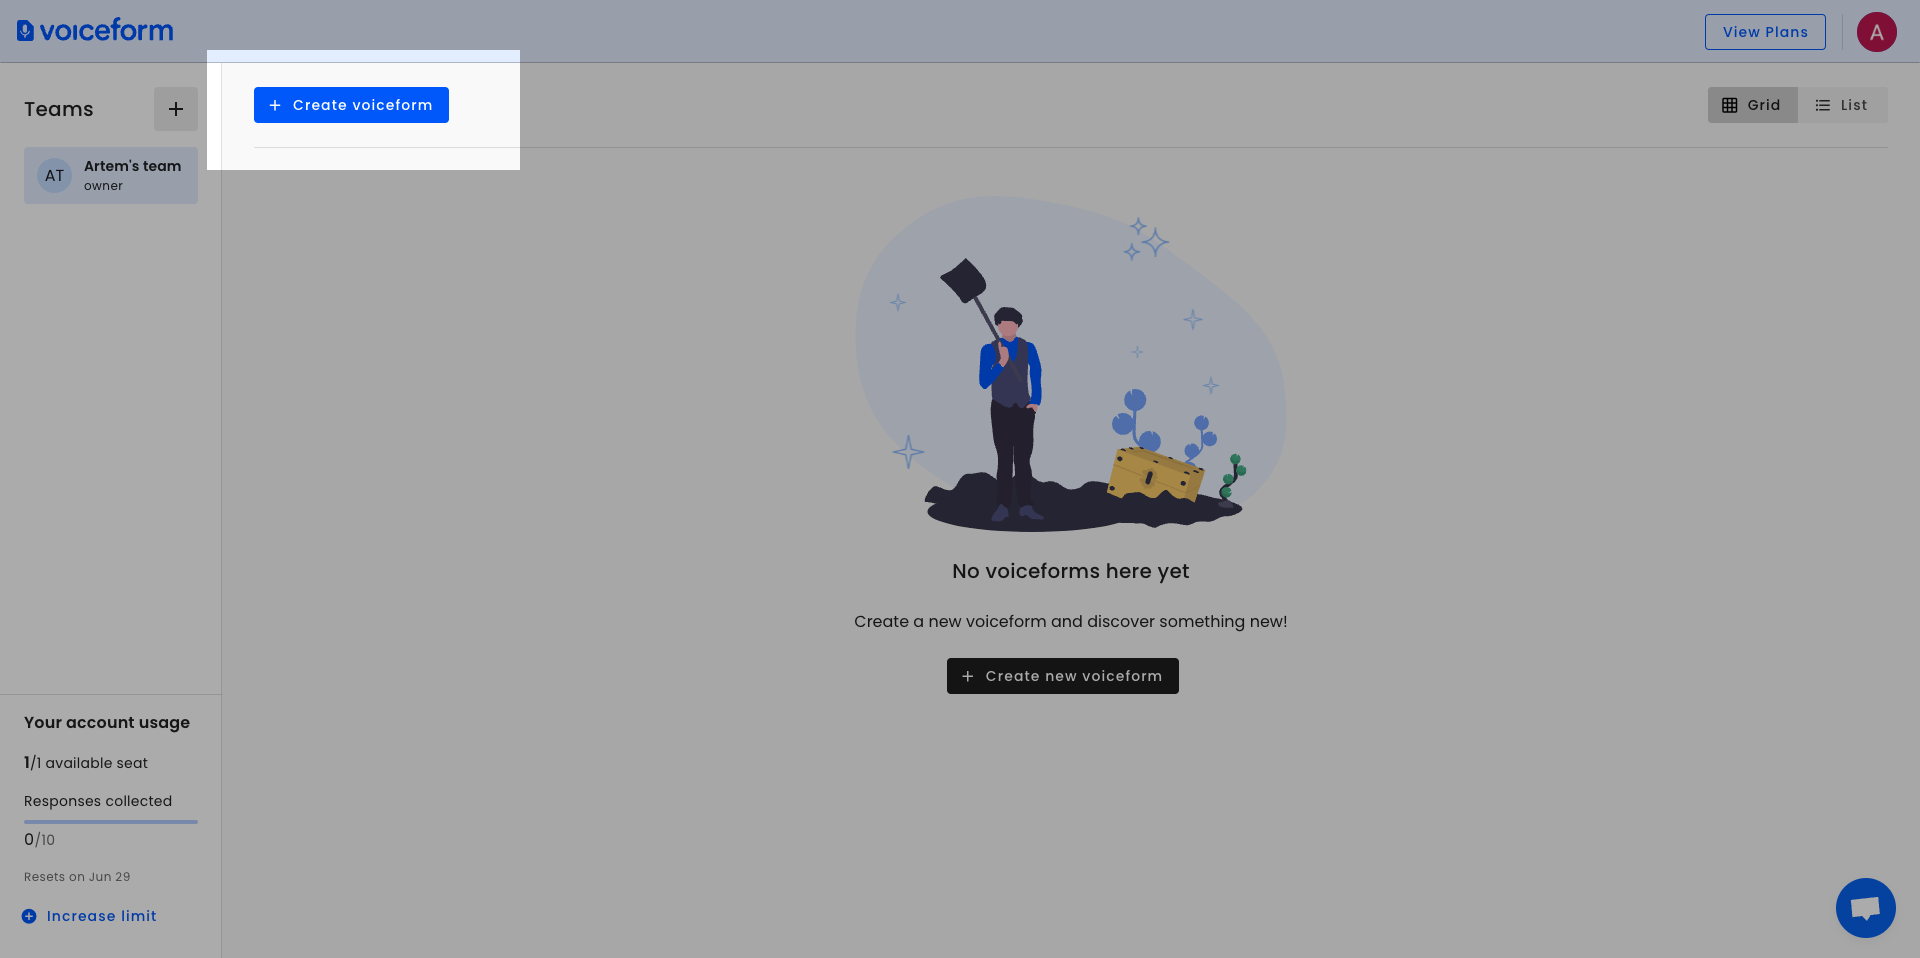
- Go to the team dashboard and click on "+ Create voiceform" button at the top left corner.
-
You should a pop up with 3 options "Start from scratch", "Use a template", and "Auto-Generate"
Starting From Scratch
-
On "Create a new voiceform" popup click on "Start from scratch" option
-
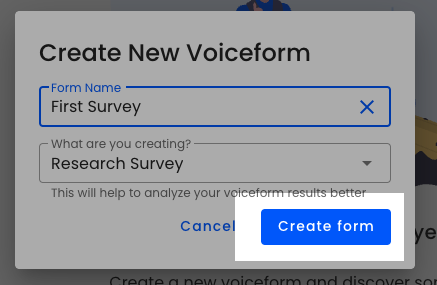
Type survey name and select a survey type. Note: Its pretty important to specify a correct survey type because this impacts on how system would process survey submissions.
-
Press "Create form" button.
Using a template
-
On "Create a new voiceform" popup click on "Use a template" option
-
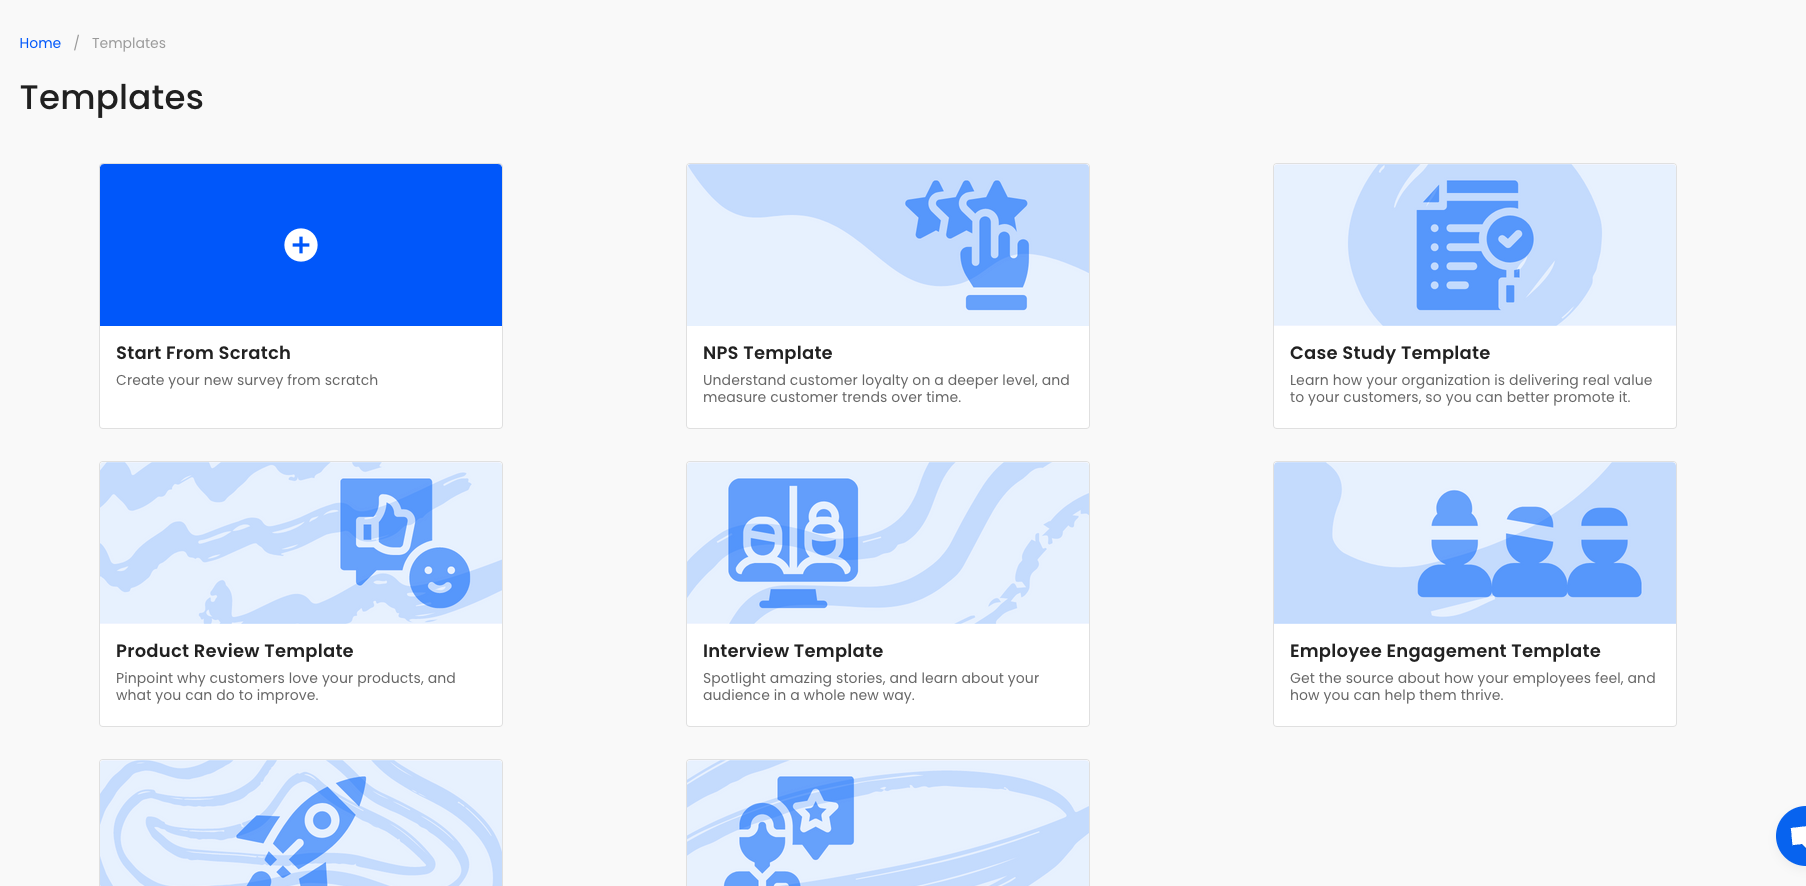
Select one of the of the offered templates
-
Type survey name and select a survey type. Note: Its pretty important to specify a correct survey type because this impacts on how system would process survey submissions.
-
Press "Create form" button.
Auto-Generate
-
In the “Create a new voiceform” popup, click on the “Auto-Generate” option.
-
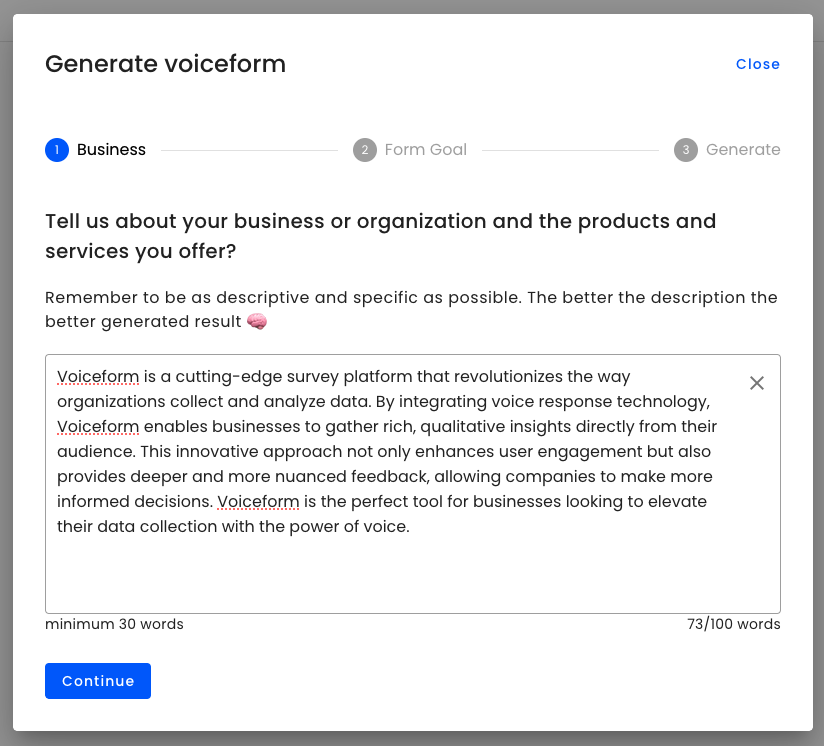
Write the description of your business. This context will be used by Voiceform AI to tailor the survey specifically to your business needs. After that, press the “Continue” button. Note: You will need to specify the business description only once; after that, it will be saved within your team and populated automatically.
-
Select the survey length. By default, it is set to 5 questions.
-
Select a survey type. Note: It is important to specify the correct survey type as this impacts how the system processes survey submissions.
-
Write the survey goal. This goal is used by AI to combine the context of your business with the specific survey use case.


-
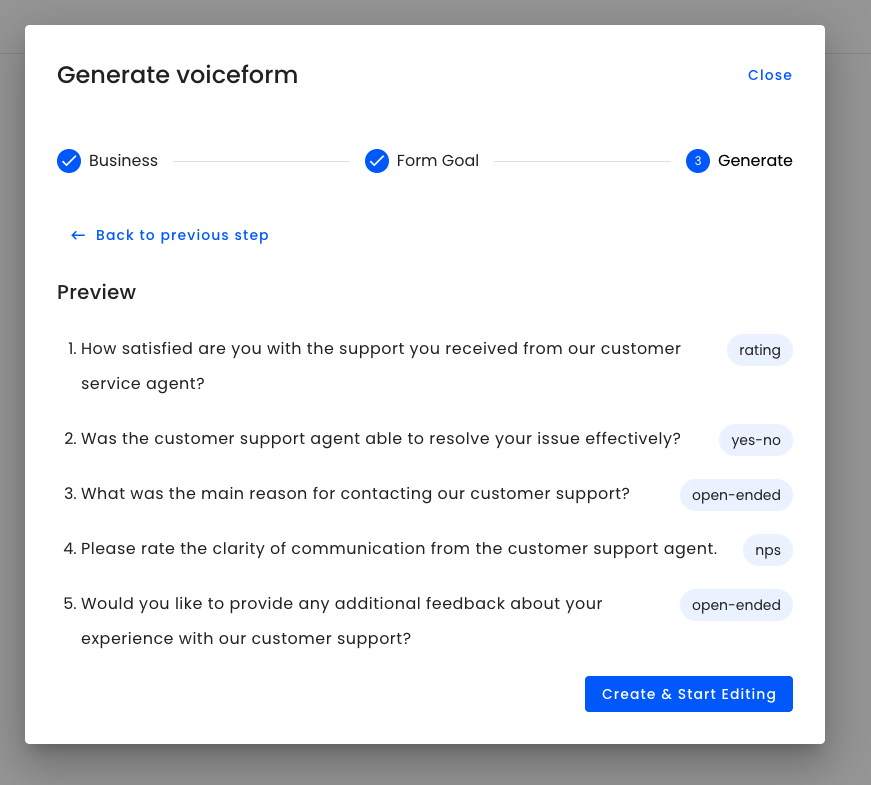
Press the “Continue” button and wait for the survey to be generated. This process should take no longer than a minute.
-
If you are satisfied with the survey, press the “Create & start editing” button. If you would like to make adjustments and regenerate the voiceform, hit the “<- Back to previous step” button.
Updated about 1 year ago