

Salesforce
In this tutorial, you will learn how to effectively integrate Salesforce with Voiceform to optimize your business processes. We will provide step-by-step instructions on how to set up the integration and utilize its various features. By the end of this tutorial, you will have a clear understanding of how to leverage the powerful combination of Salesforce and Voiceform to create interactive forms and surveys. You will also gain insights on how this integration can enhance your CRM capabilities and improve customer engagement.
Connecting Salesforce Account to Voiceform
Before connecting to Salesforce please make sure that the requirements bellow are covered:
- You have the Salesforce Integration enabled on your Voiceform account. If it isn't enabled, please reach out to Voiceform customer support team.
- You are logged into your Voiceform account and you are the account owner.
- You are logged into Salesforce and your account has permissions to connect external applications.
-
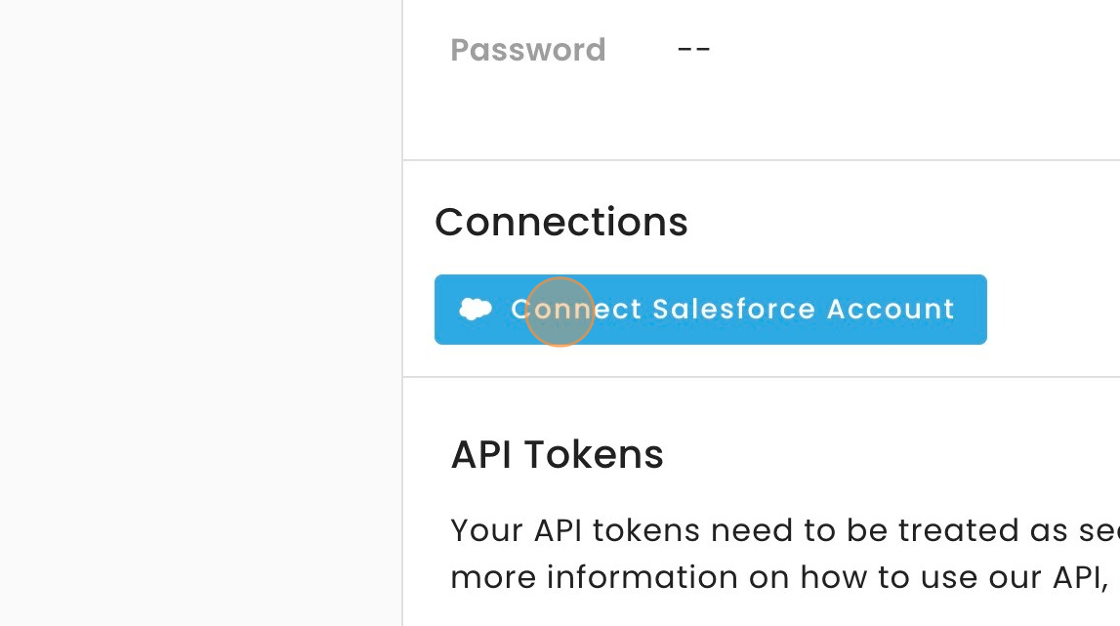
Navigate to your Account page https://app.voiceform.com/dashboard/account
-
Click "Connect Salesforce Account". This should redirect you to the Salesforce login page.
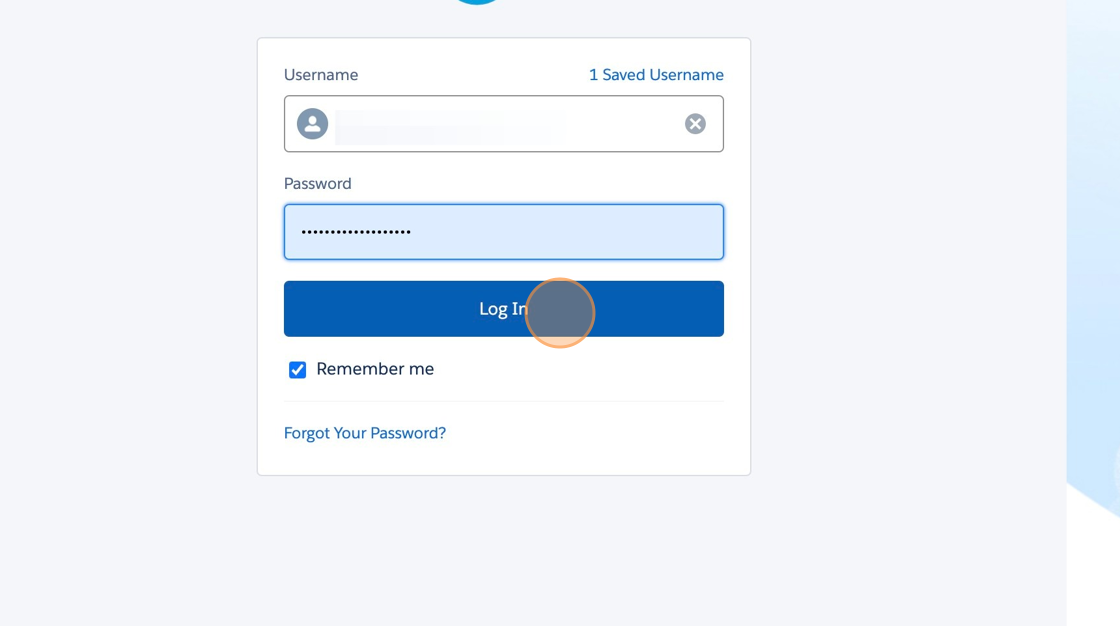
- Login to Saleforce.
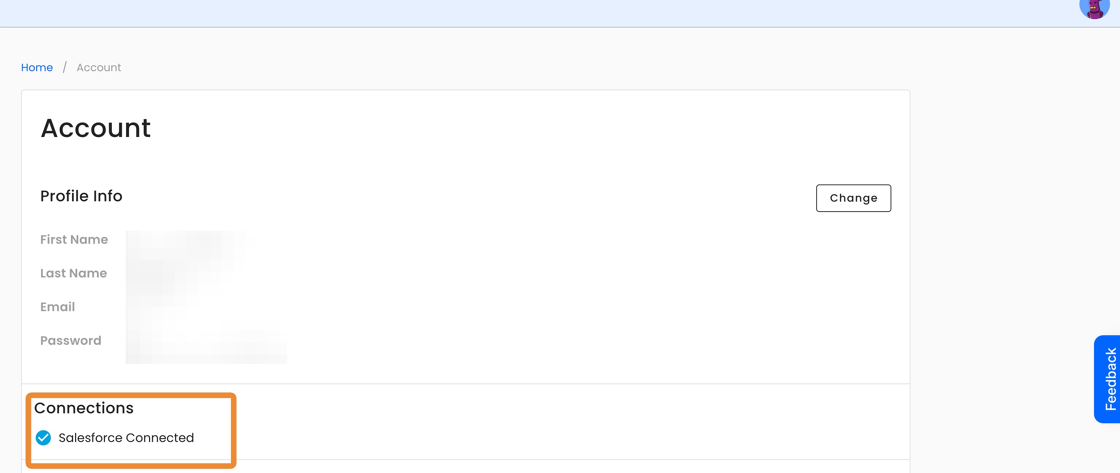
- Accept Requested Permissions for Voiceform integration

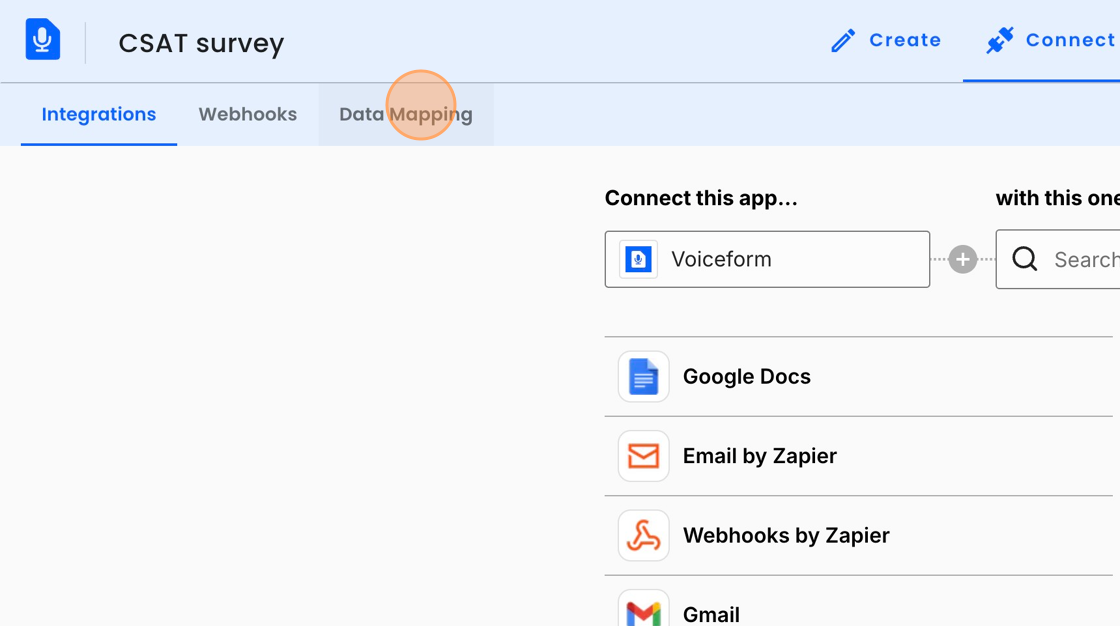
Map data from Voiceform to Salesforce
TipBefore creating data maps make sure you have connected your saleforce account with Voiceform.
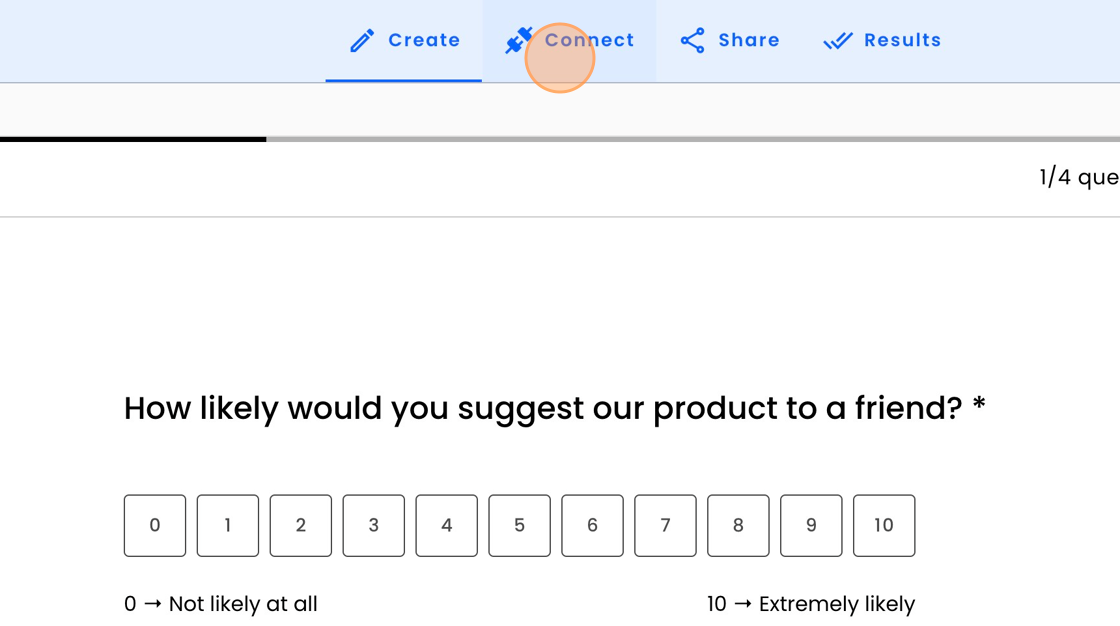
- Open the Voiceform that you wish to connect to Salesforce.
- Click "Connect"
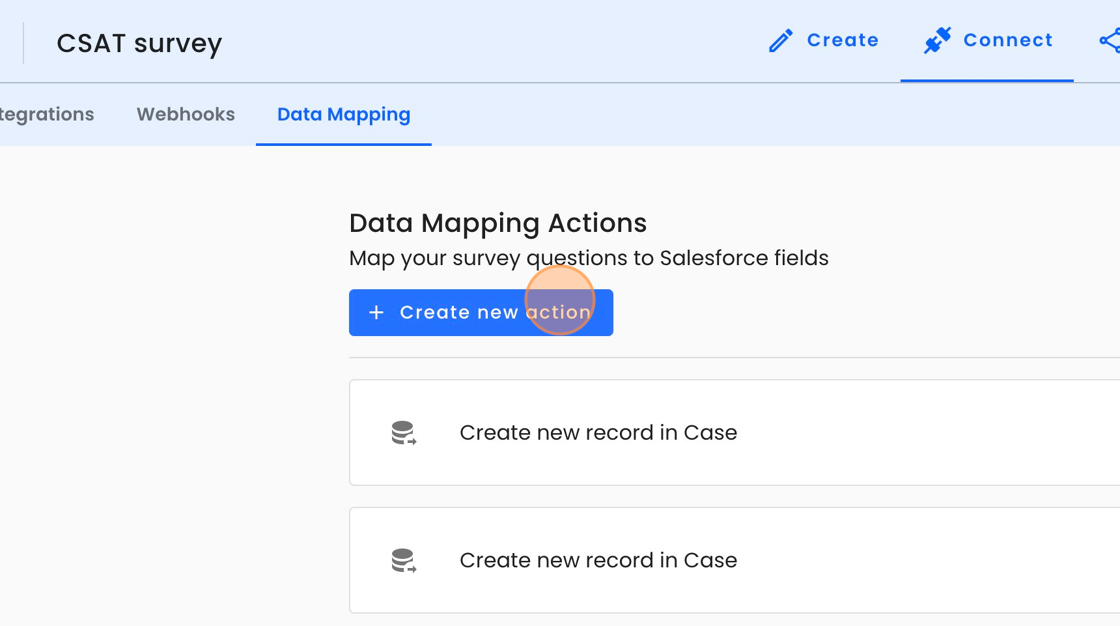
- Click "Data Mapping"
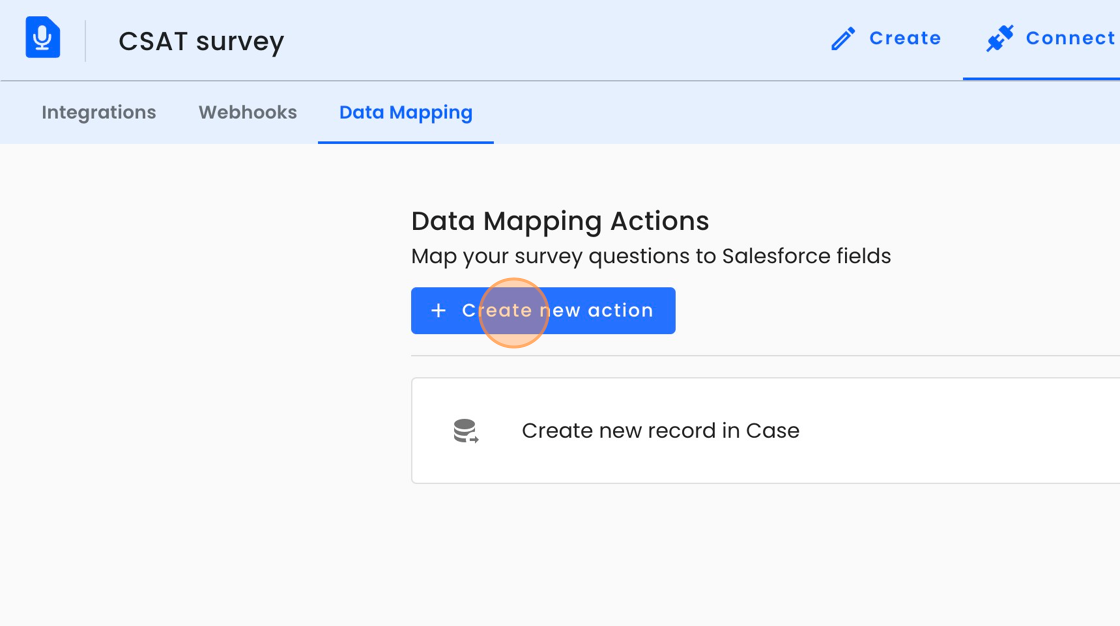
Creating a new record in salesforce
- Click "Create new action"
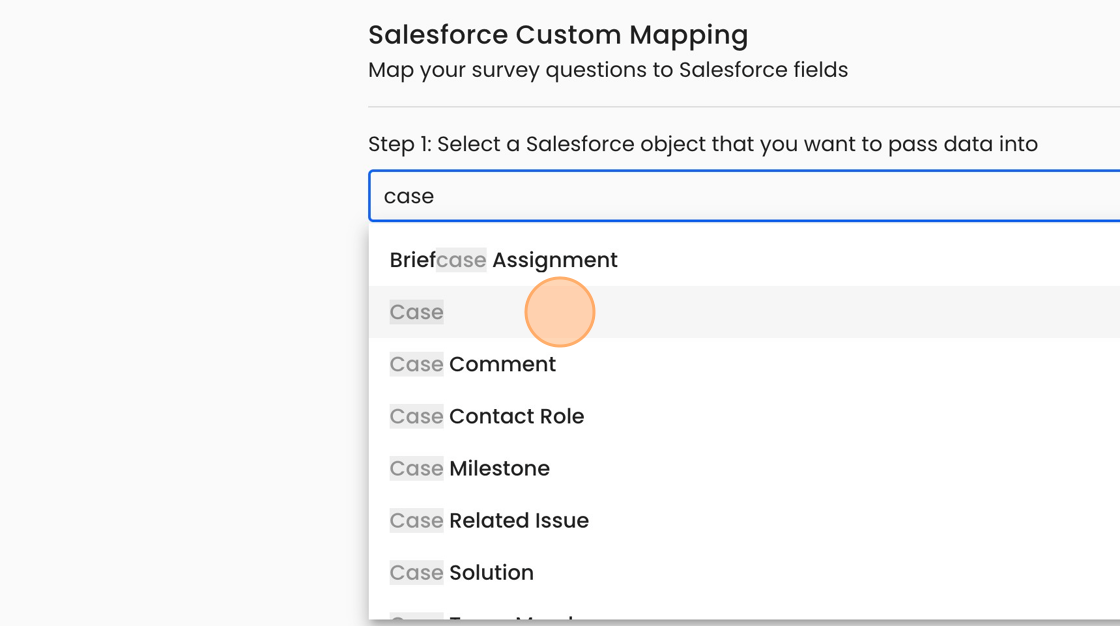
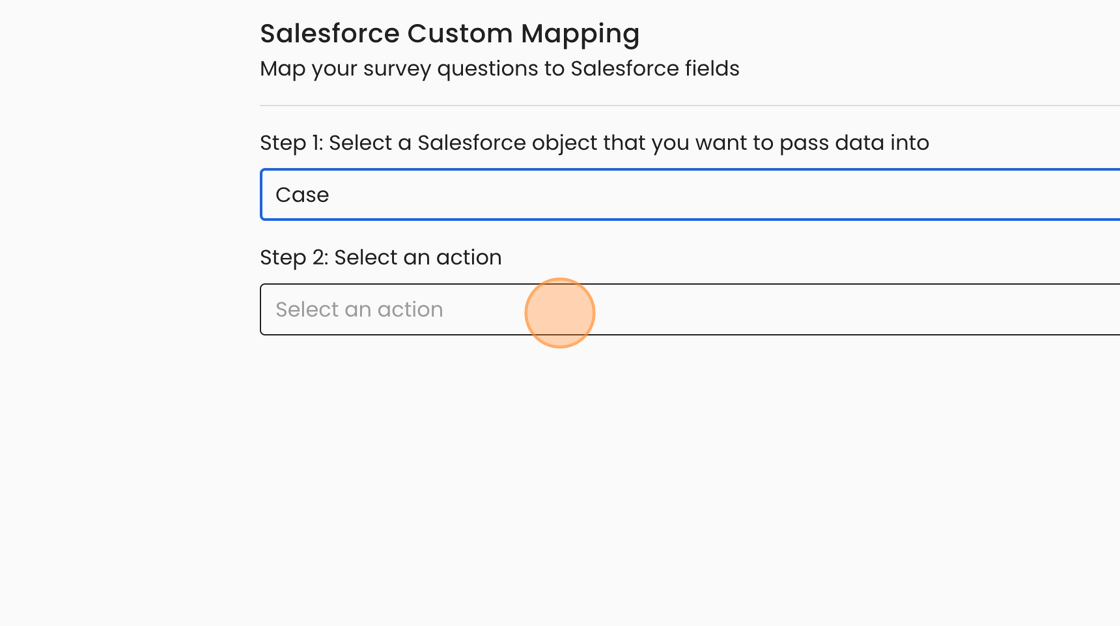
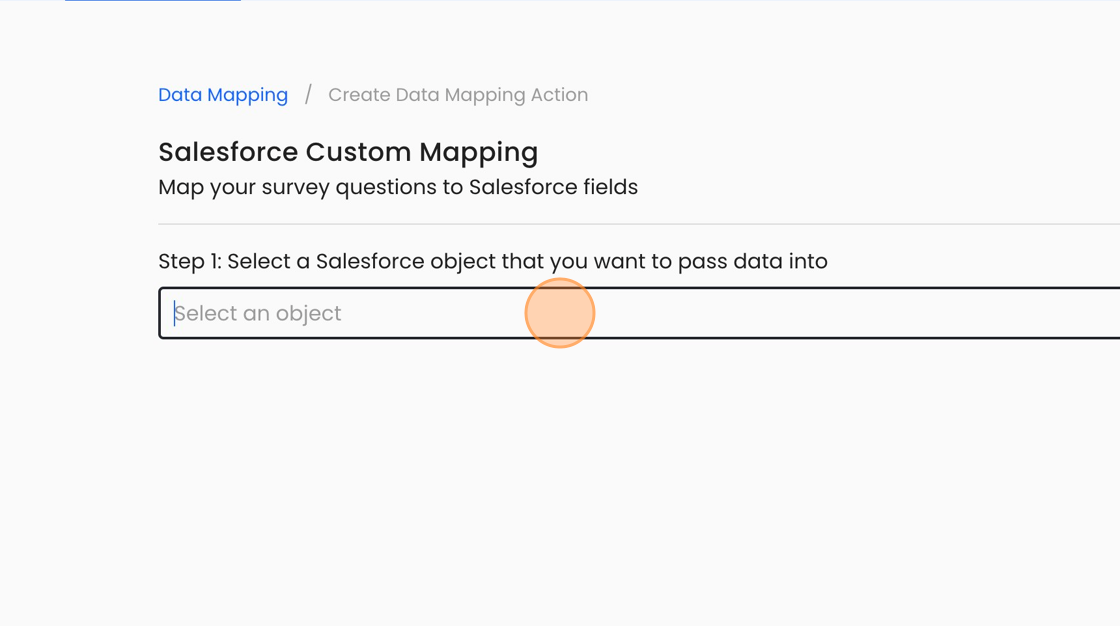
- Click the "Select an object" field.
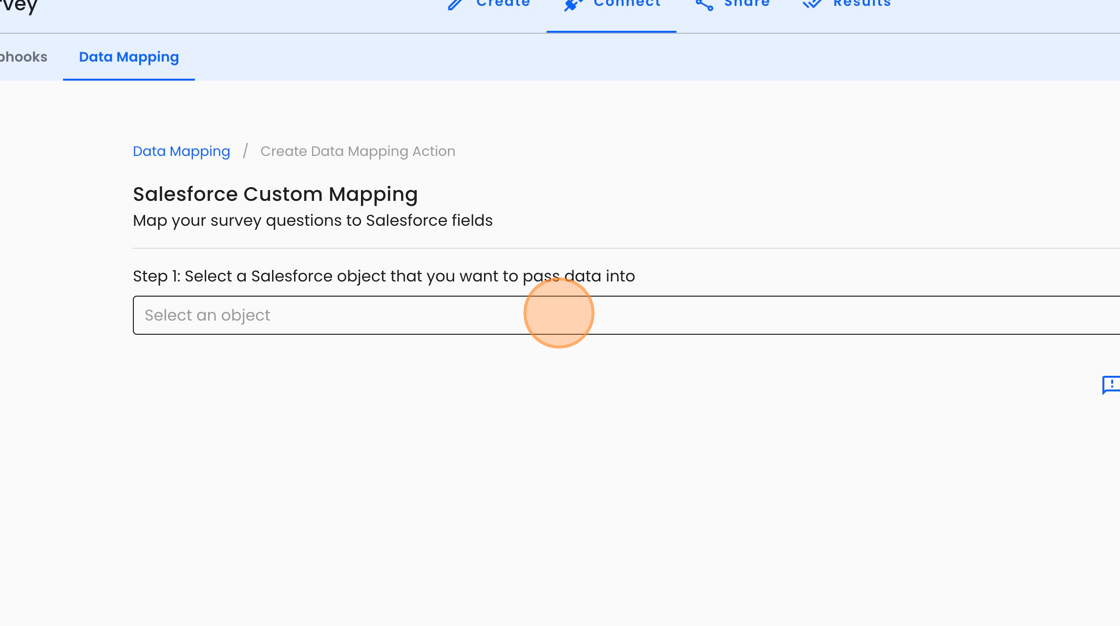
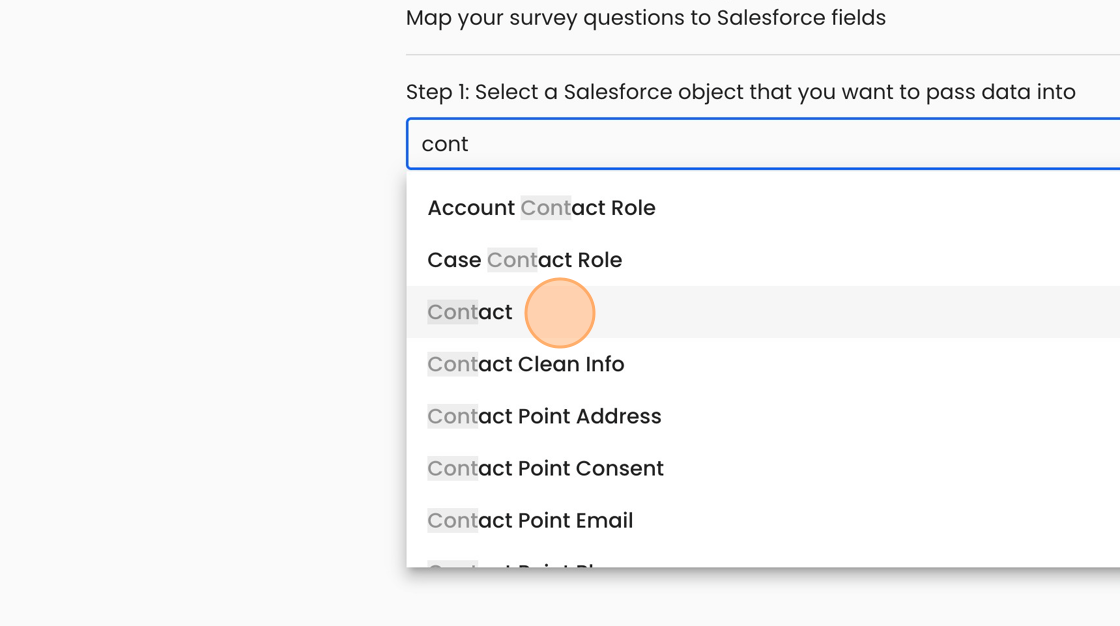
- Select a salesforce object where you want to pass your data. For example "Case."
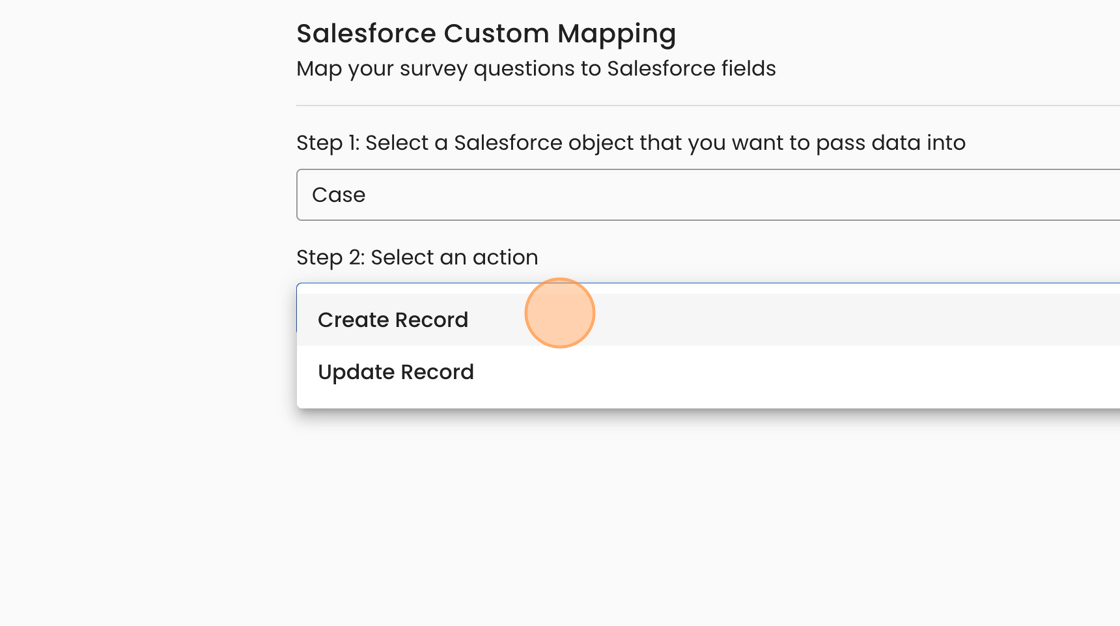
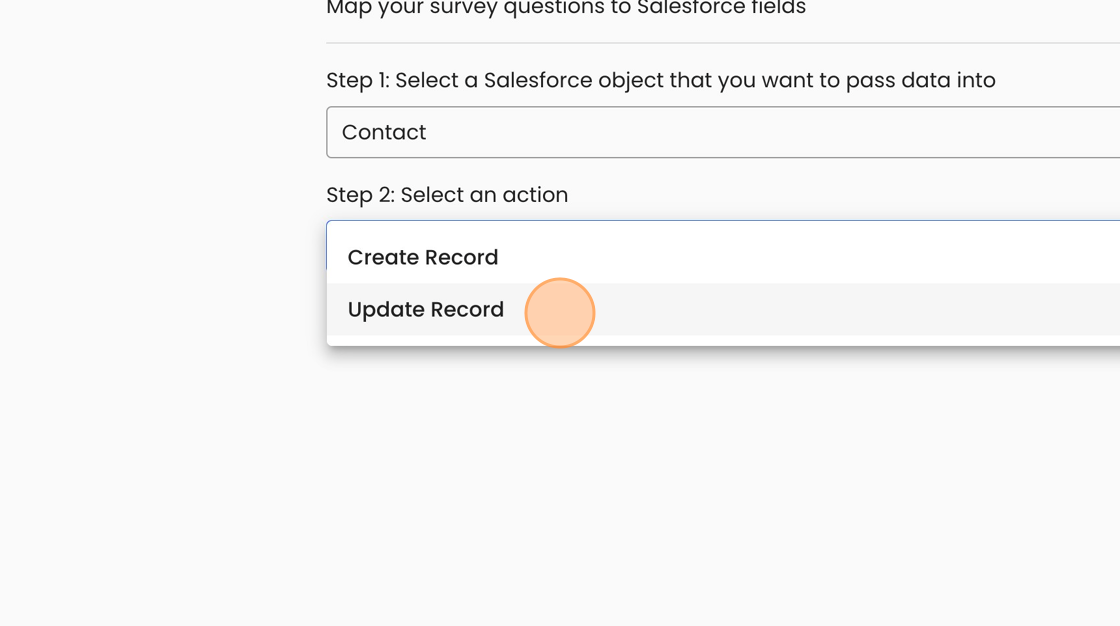
- Select an action. Let's try to create a new record first.
- Click "Create Record"
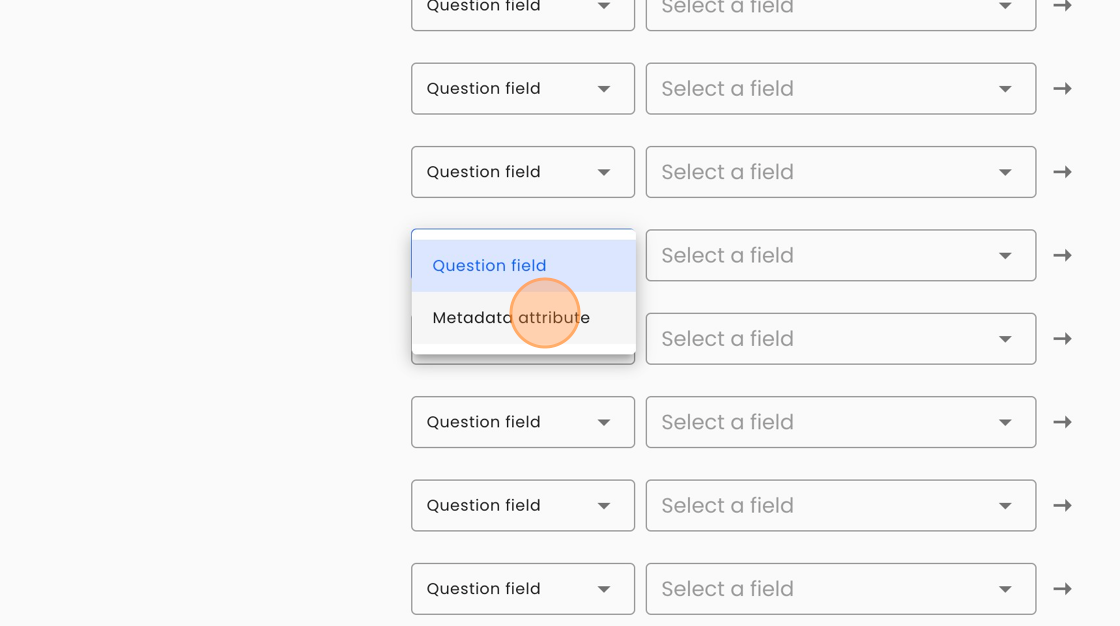
- Select a question you would like to be mapped to the object field.
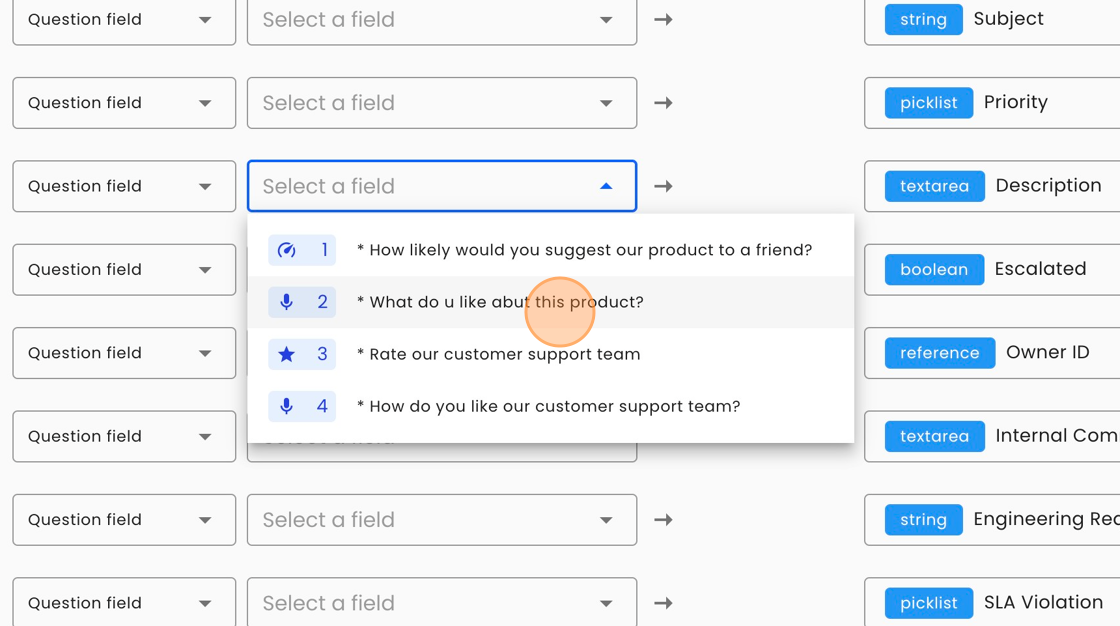
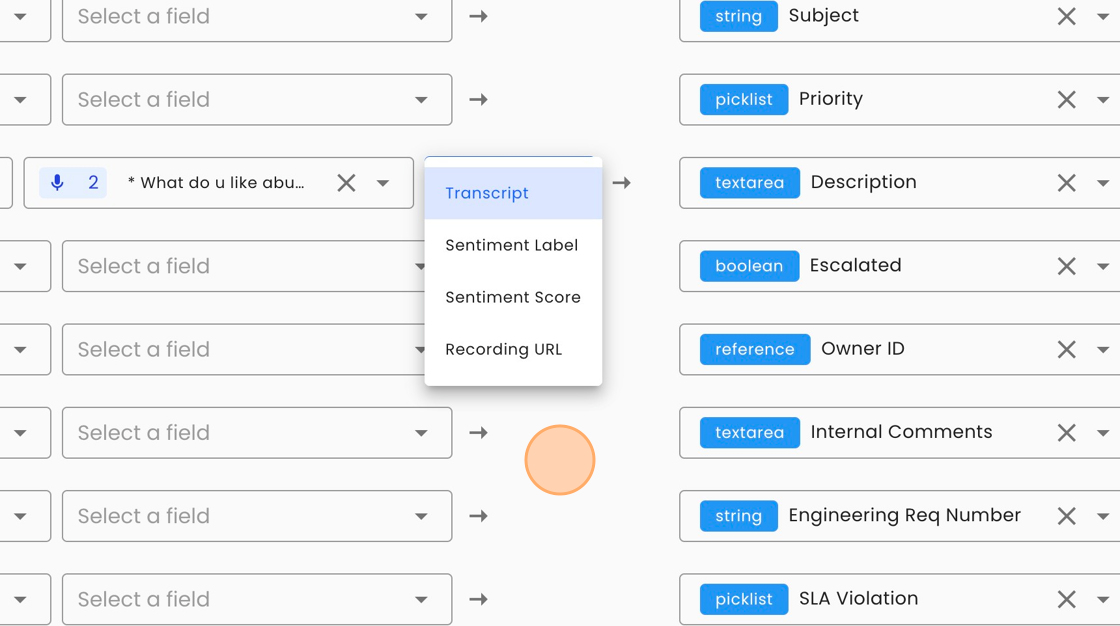
- If you selected the "voice response" question type you have more options for mapping.
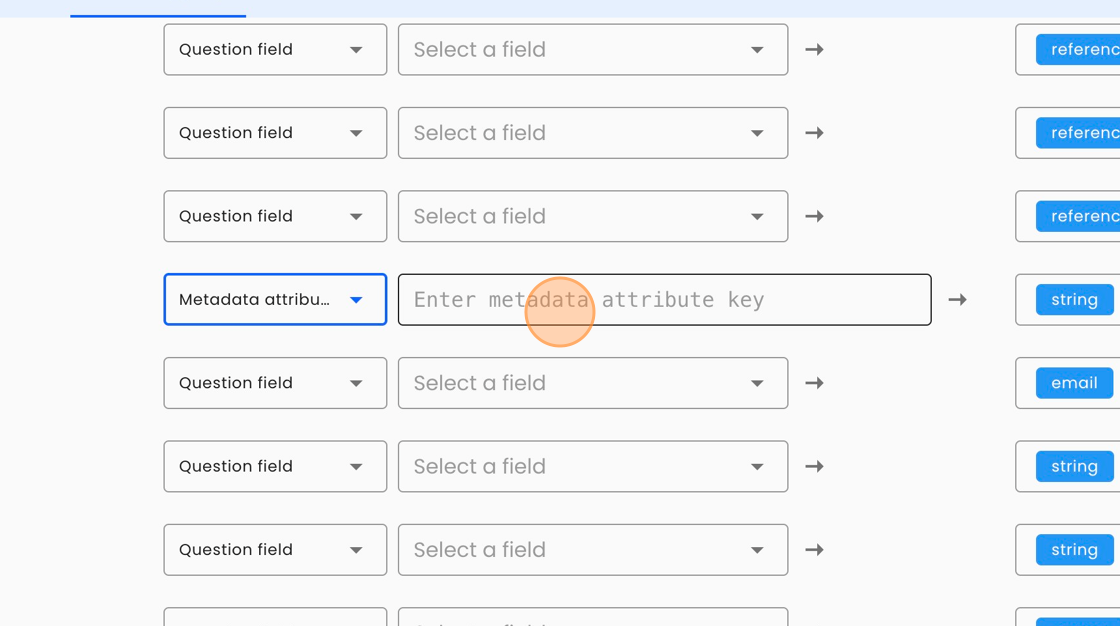
- If you want to pass metadata values to salesforce please select "Metadata attribute".
- Type the metadata attribute key. For example "custom_id". This key should be passed as a query parameter when you share your form.
(Link example: https://app.voiceform.com/to/dbddjddiqdkx/?custom_id=dsndjn-232dsbd-2378d)
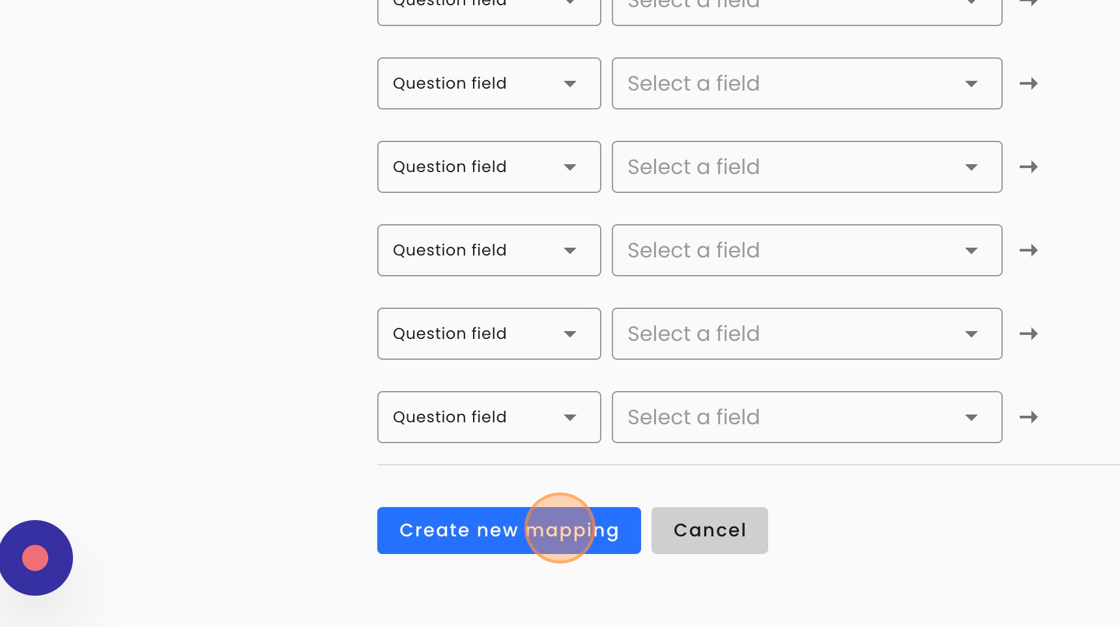
- Click "Create new mapping"
Updating existing record in salesforce
- Instead of creating a new action, let's update one. . Click "Create new action"
- Click the "Select an object" field.
- Select salesforce object.
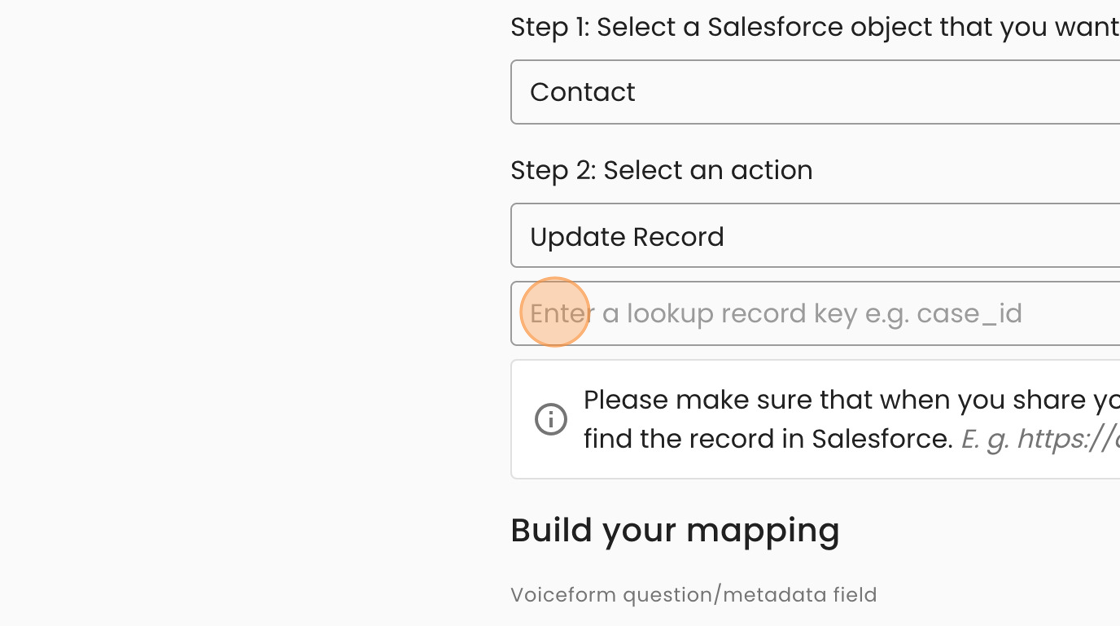
- Selecet "Update Record"
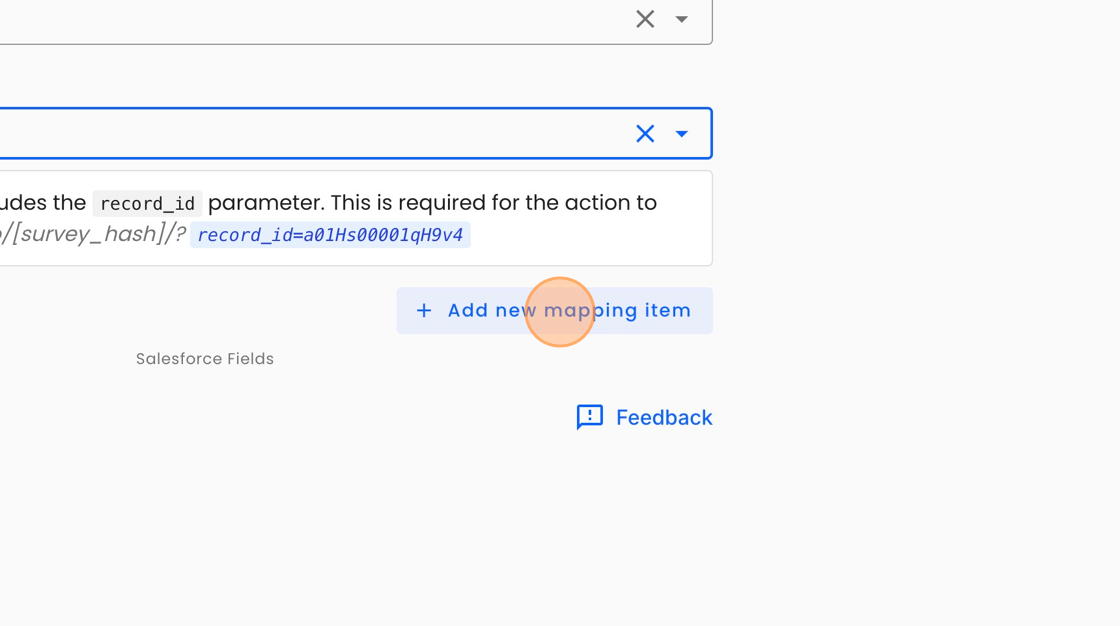
- Type a record lookup key. This key is used to find the record id in Salesforce and it must be passed when you share a form link. By default the key name is record_id.
E. g. [[https://app.voiceform.com/to/dwhdvqwj/?case_id=webckcwbb]]
- Click "Add new mapping item"
- After this the process is the same as for "Create Record" action.
Verify The MappingWhen actions are added, it's time to test it. Try to submit the form and confirm the changes are applied to salesforce records.
Adding Voiceform in Post-Chat Experience
Adding required files
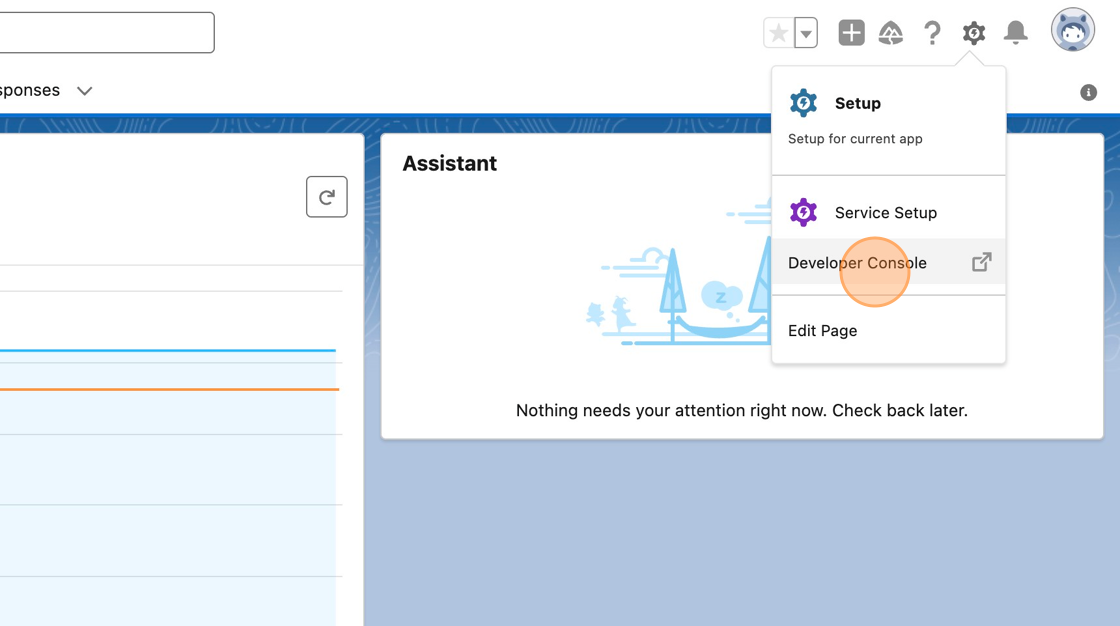
- Open Developer Console
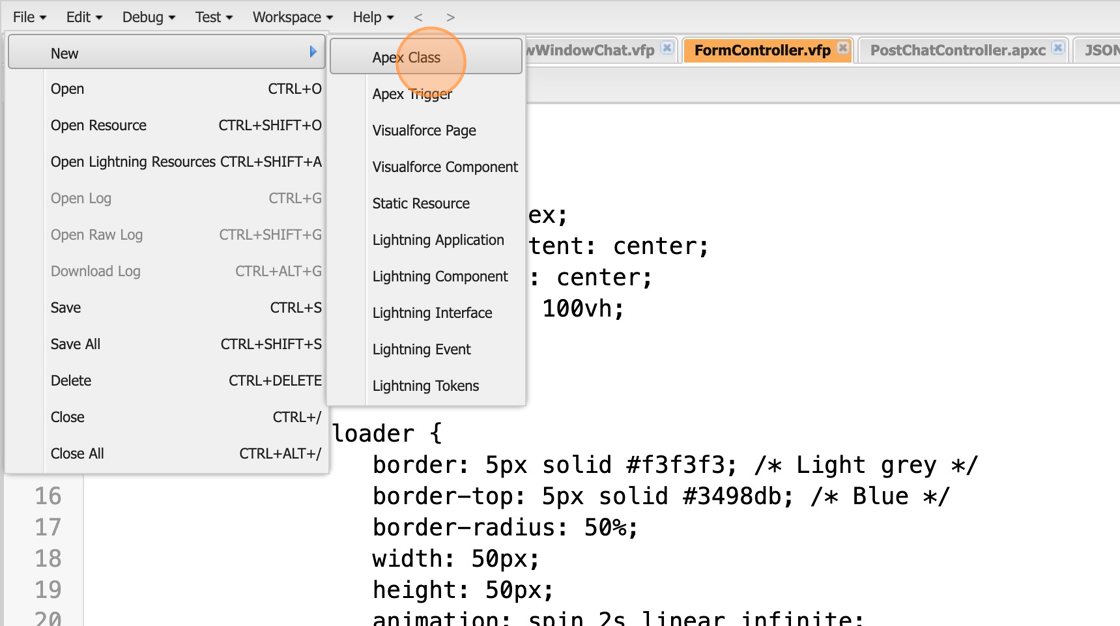
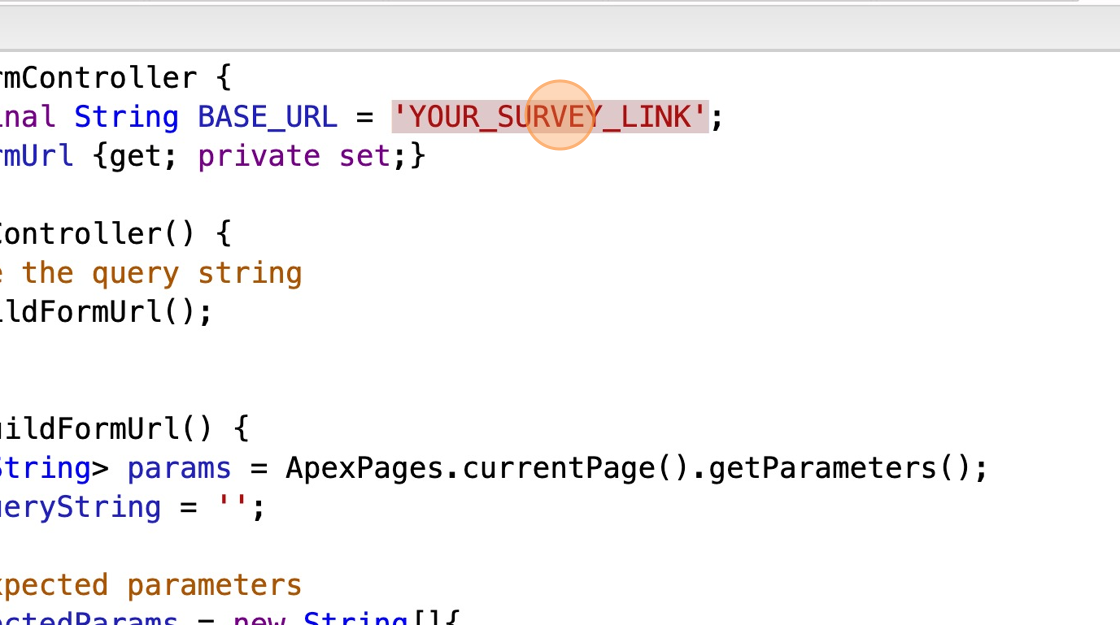
- Create a new Apex Class file. This class will be responsible for taking all the parameters from the chat and passing them to voiceform survey link. Select "Apex Class" and type "VoiceformController"
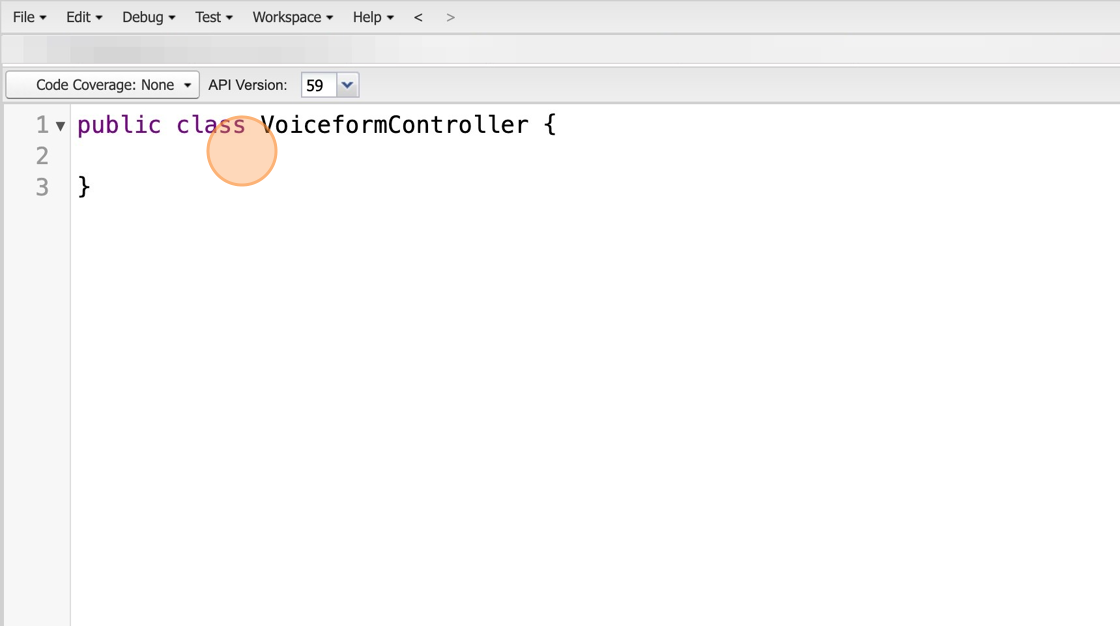
- This should create a new file with empty class.
public class VoiceformController {}
- Insert this code into this class. You may just copy and paste it.
- Change 'YOUR_SURVEY_LINK' to the actual survey link. E. g.
https://app.voiceform.com/to/XXXX
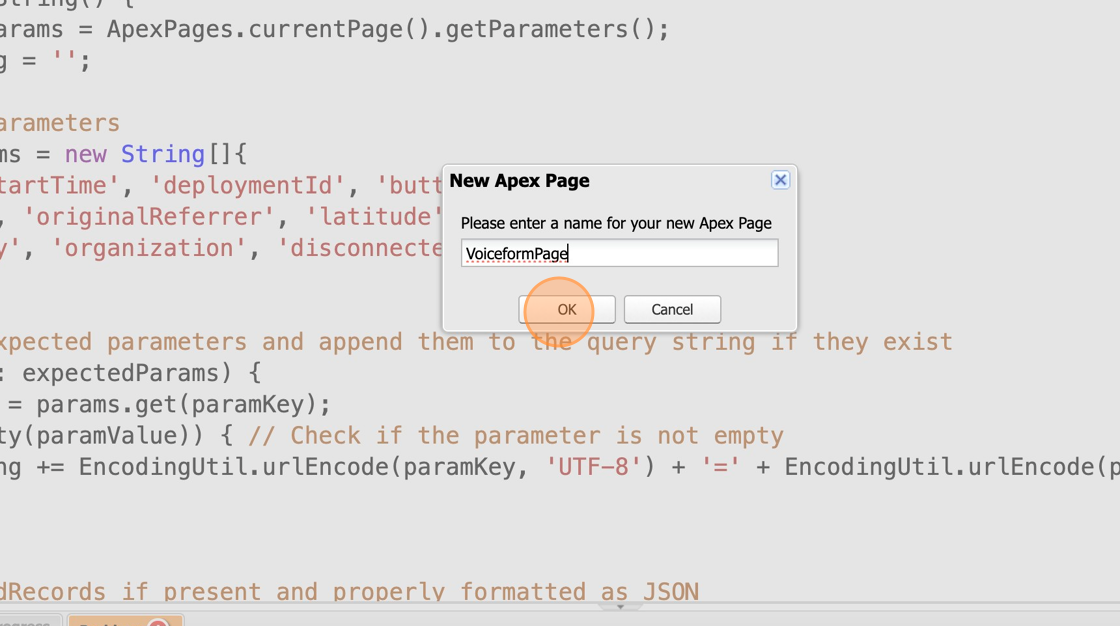
- Okay now let's create a page that will render the form. Select "Visualforce Page" and type "Voiceform Page"
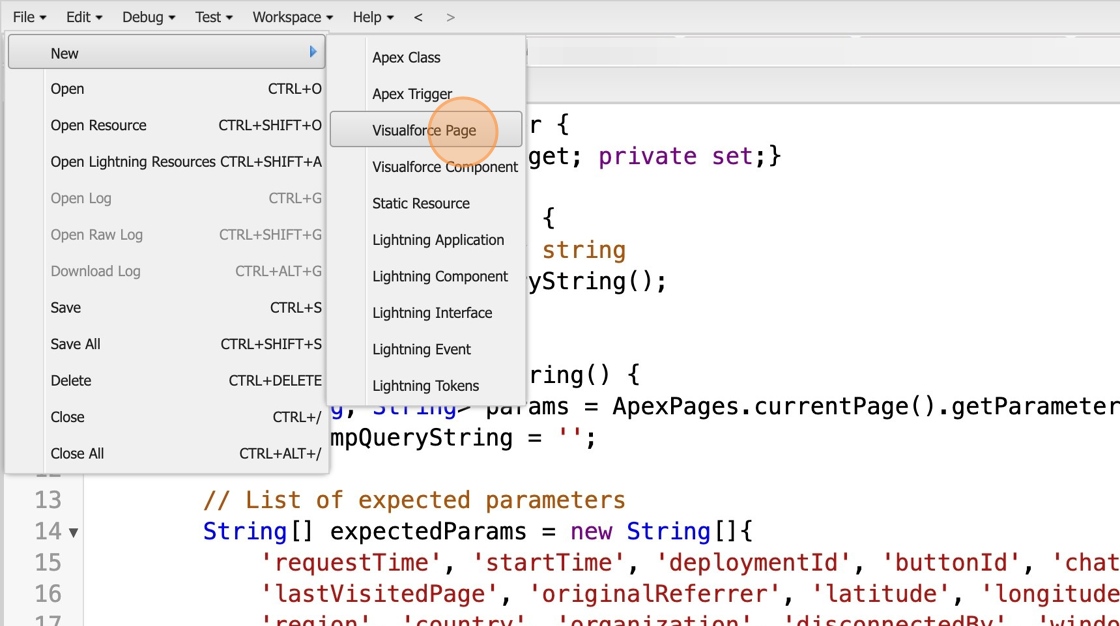
- Click "OK"
- Paste this code into this page.
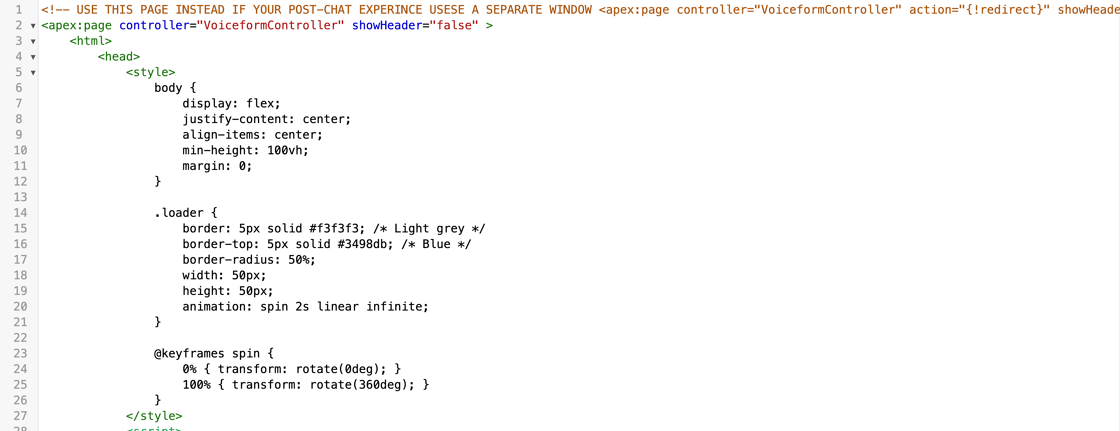
Tip: If your post-chat experience redirects users to a separate window or browser tab you can just redirect the user. That means you can clear the previous code and just use this instead
- Click here. And select "Service Setup"
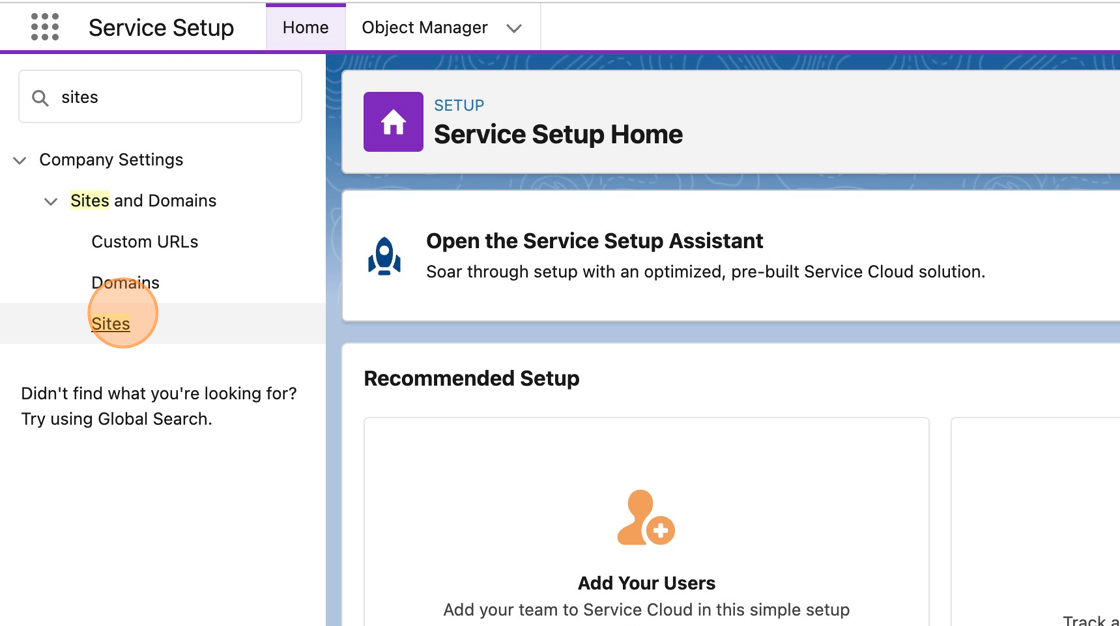
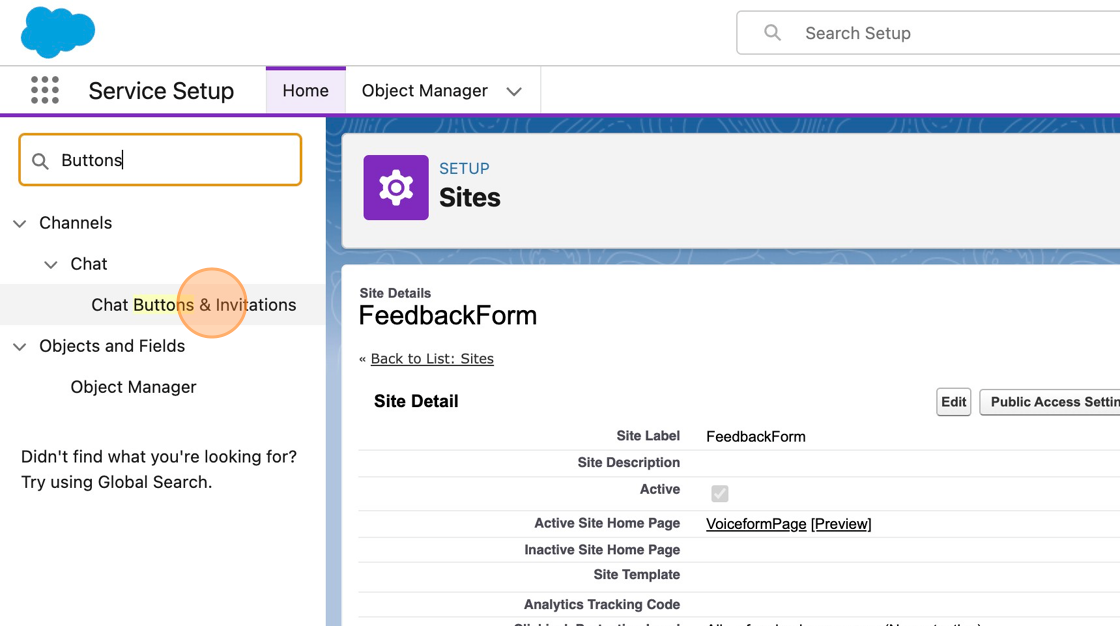
- Now connect "VoiceformPage" with some site. In "Service Setup" Search for "Sites".
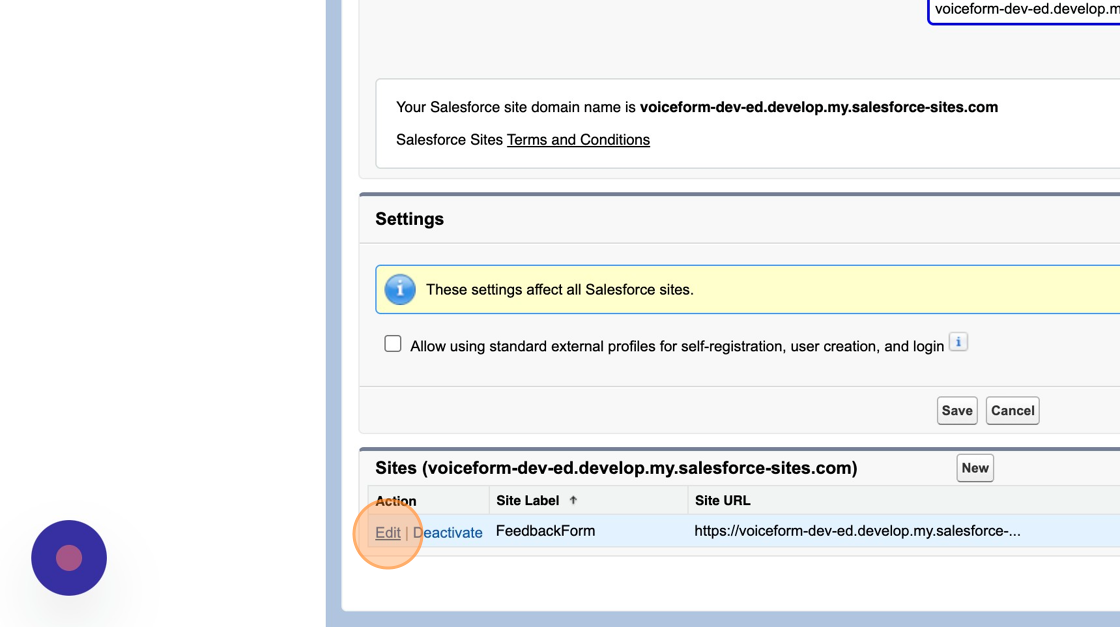
- Use existing or create a new site.
- Find "Active Site Home Page" field.
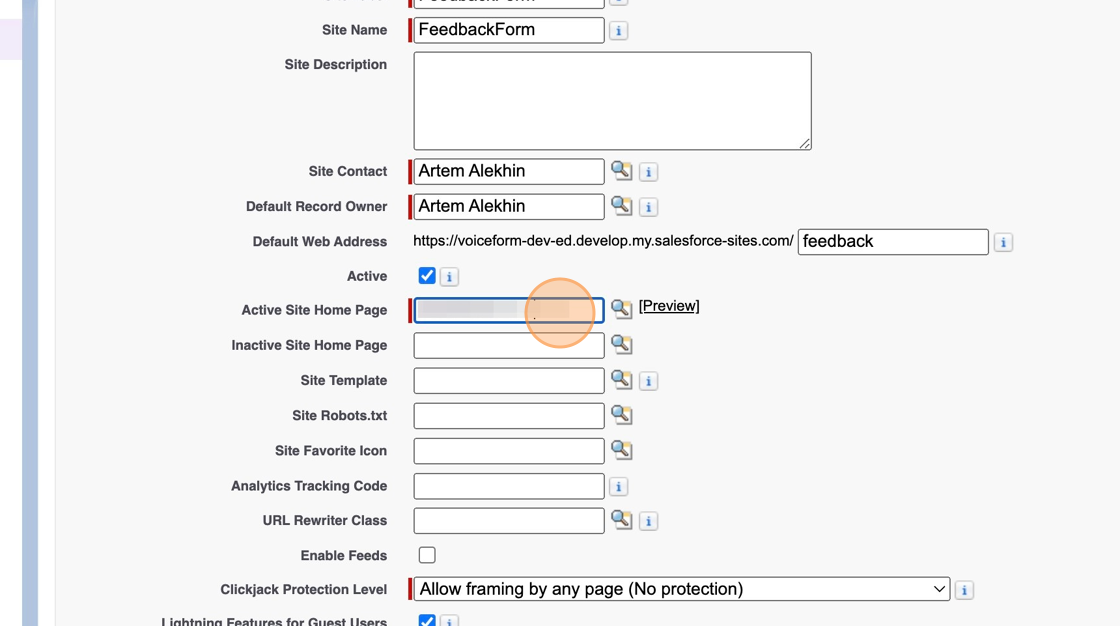
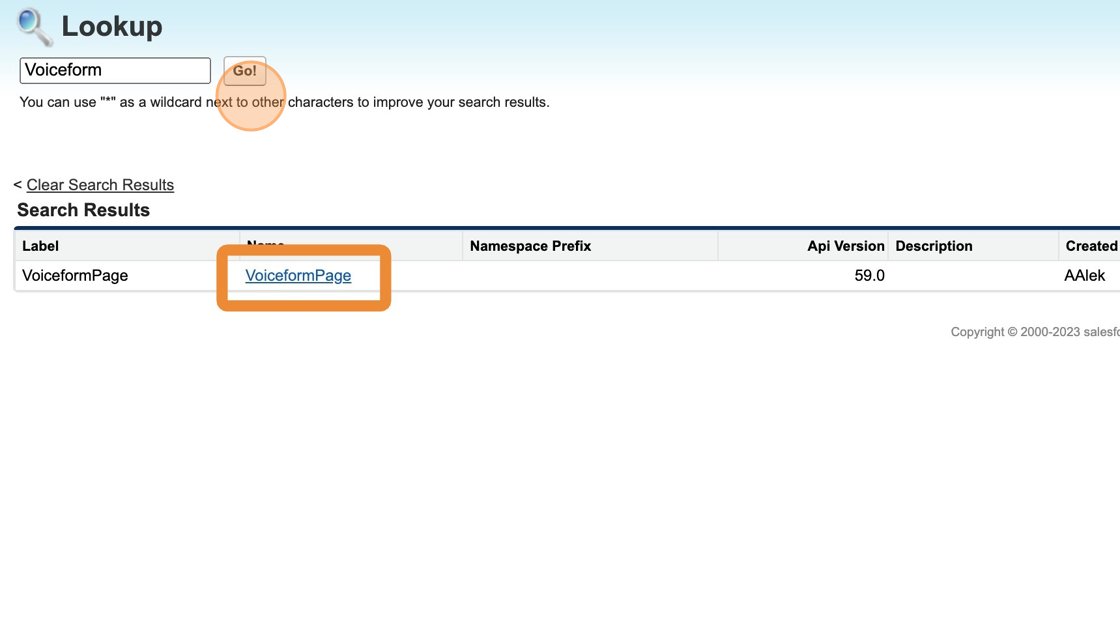
- Hit search icon.

- Search for "VoiceformPage" and select it
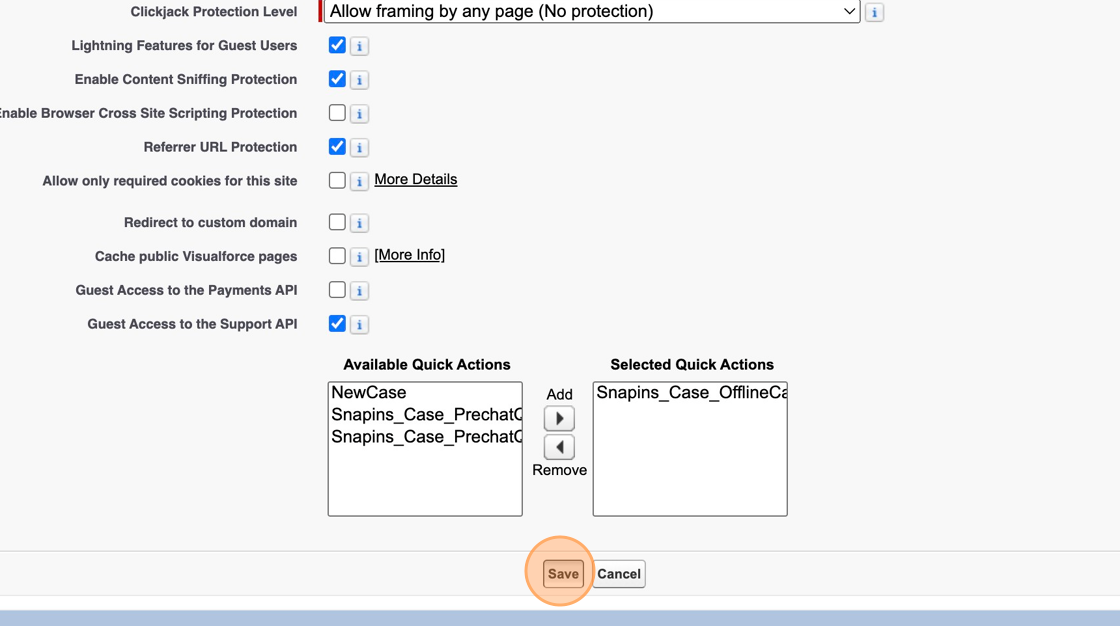
- Save
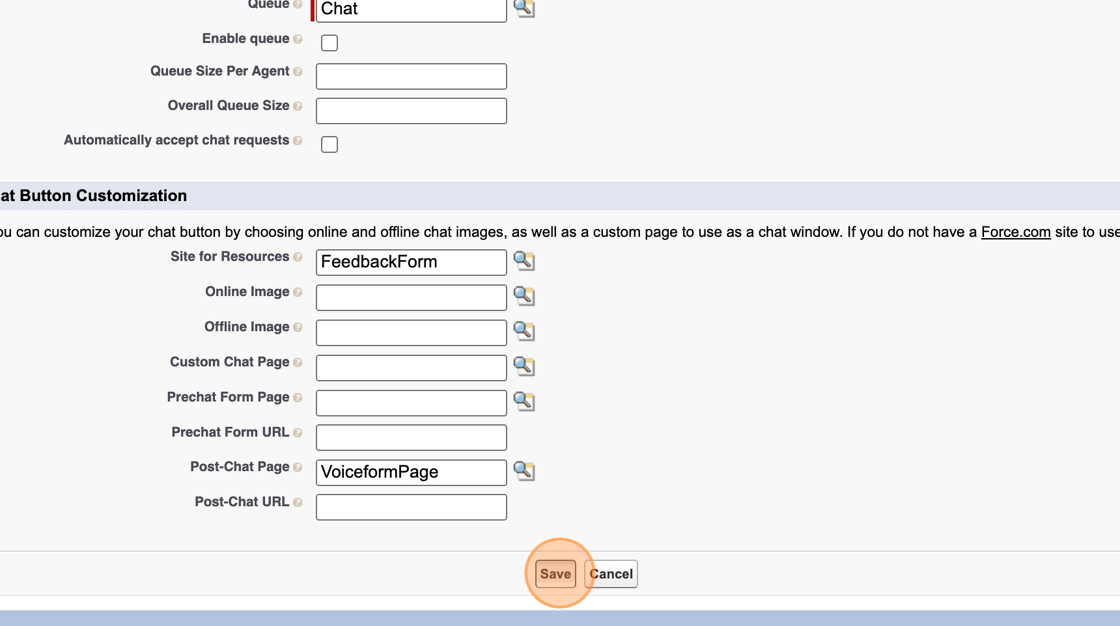
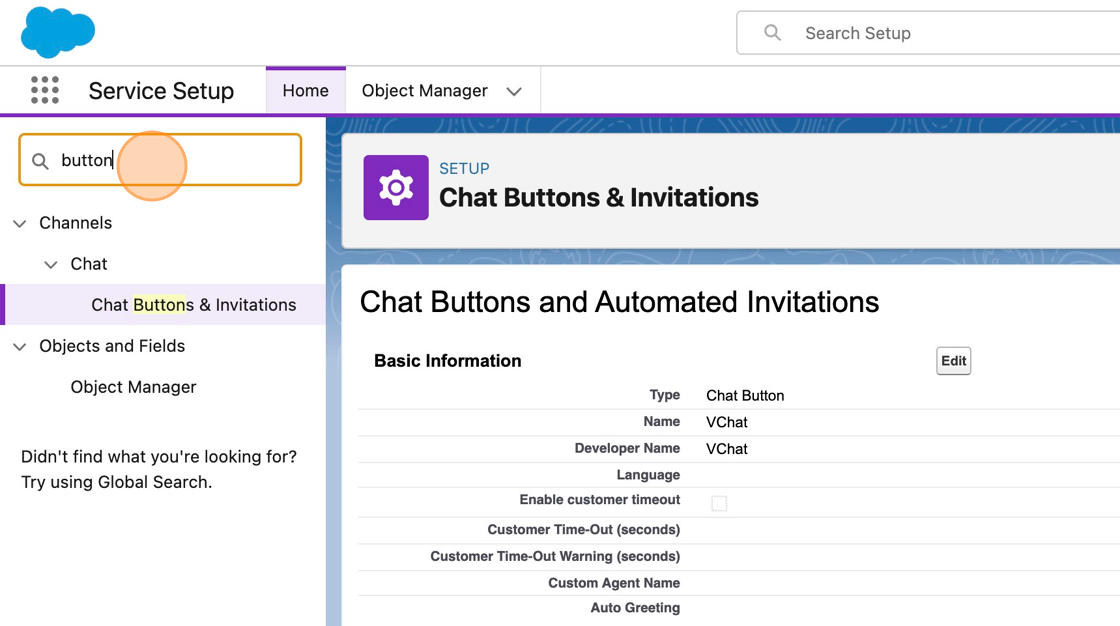
- Add our site and page to the chat button. Search for "buttons" and click "Chat Buttons & Invitations".
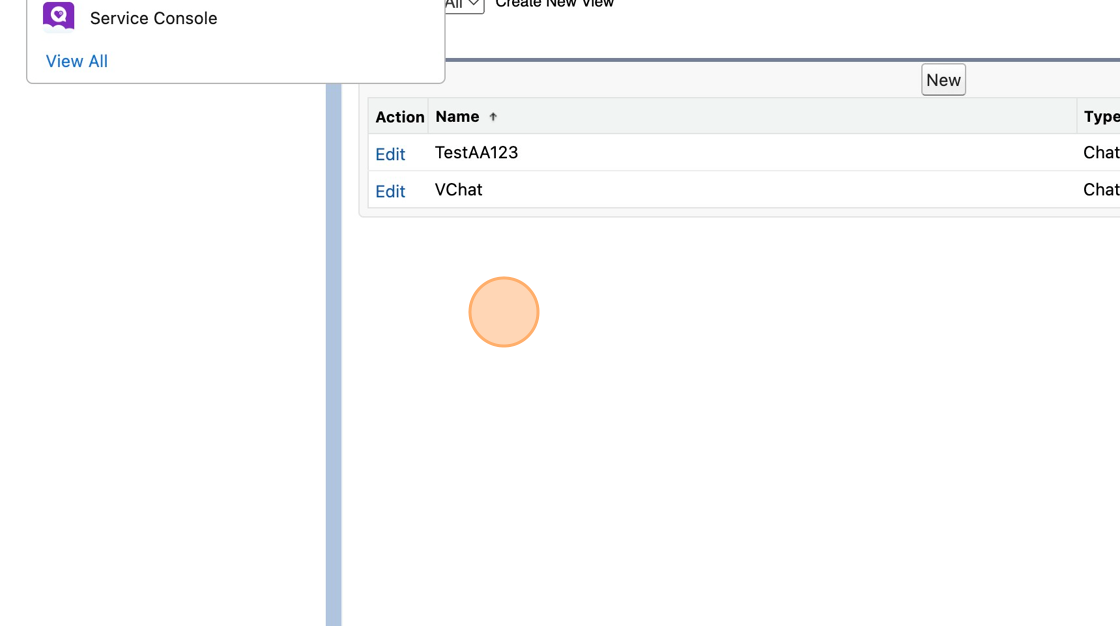
- Select an existing button or create a new one.
- Add site in "Site for Resources" and our "VoiceformPage" in "Post-Chat Page"
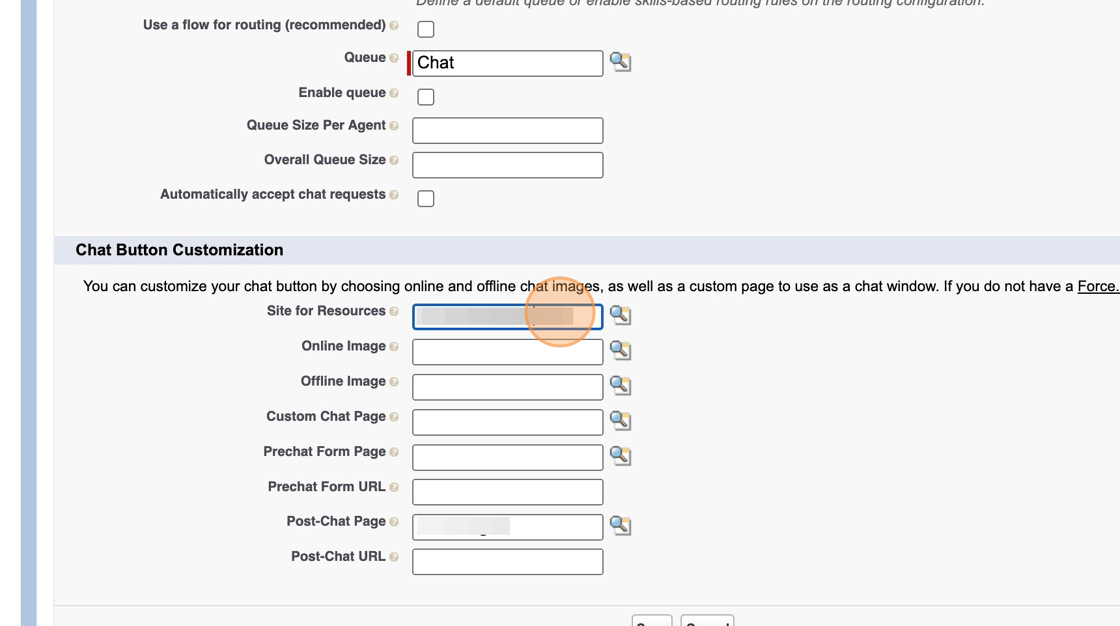
- Click "Save" button.
- Click the "Quick Find" field.
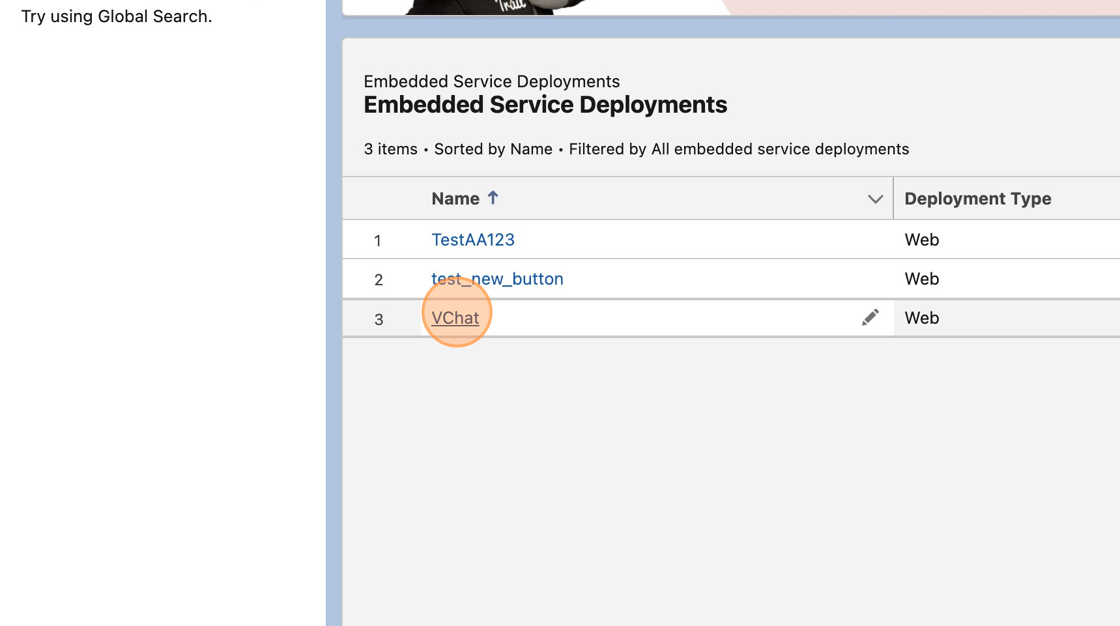
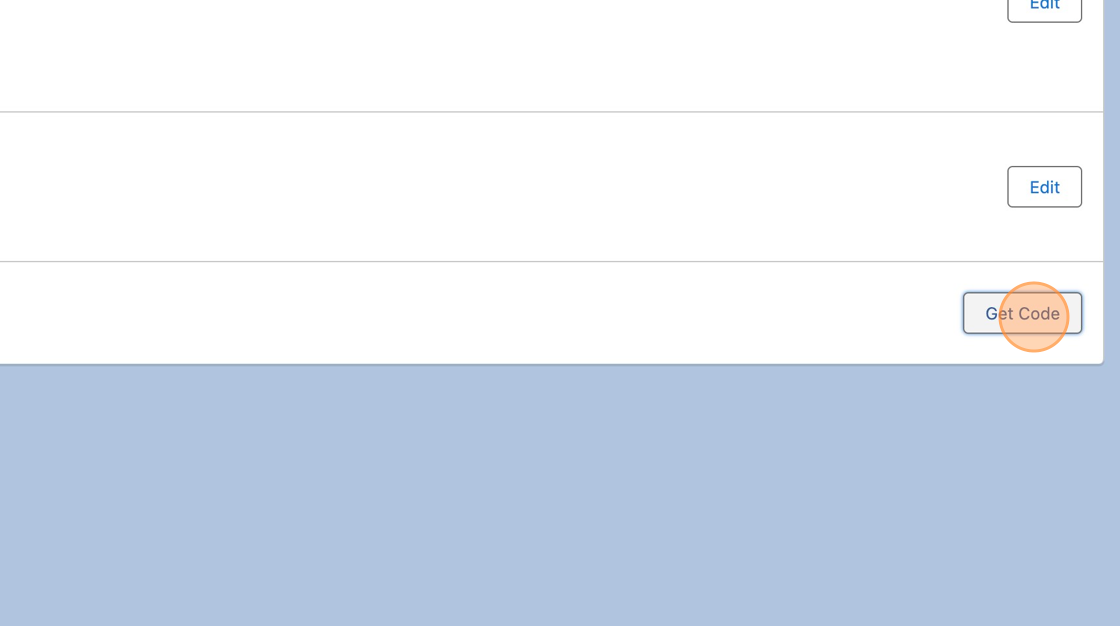
- Let's try to embed the chat button. Find and click "Embedded Service Deployments"

- Click on your button.
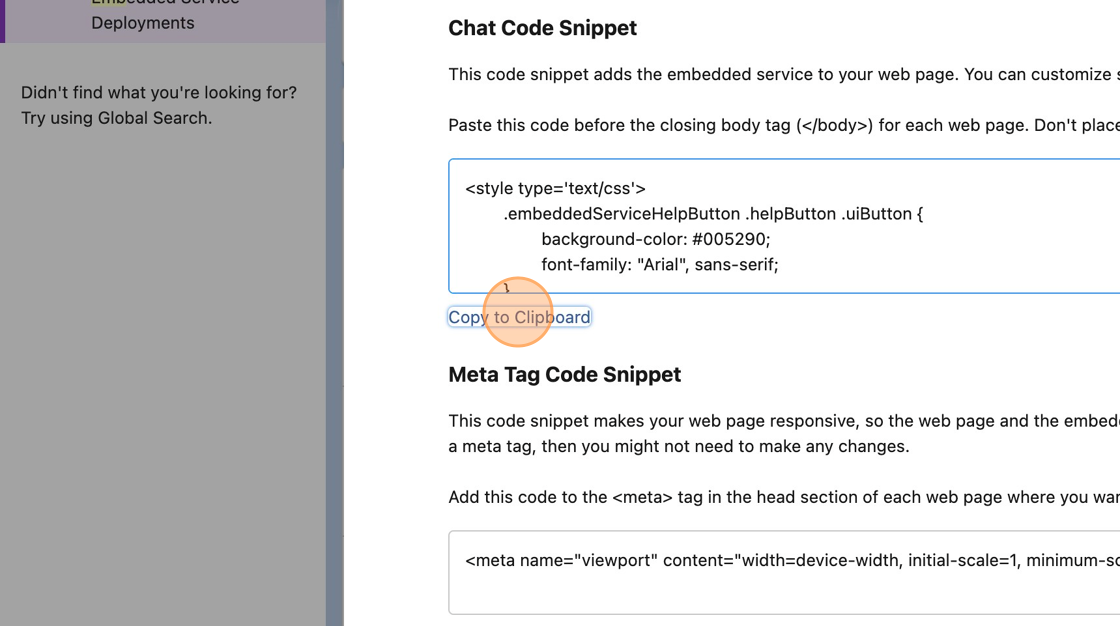
- Click "Get Code"
- Click "Copy to Clipboard"
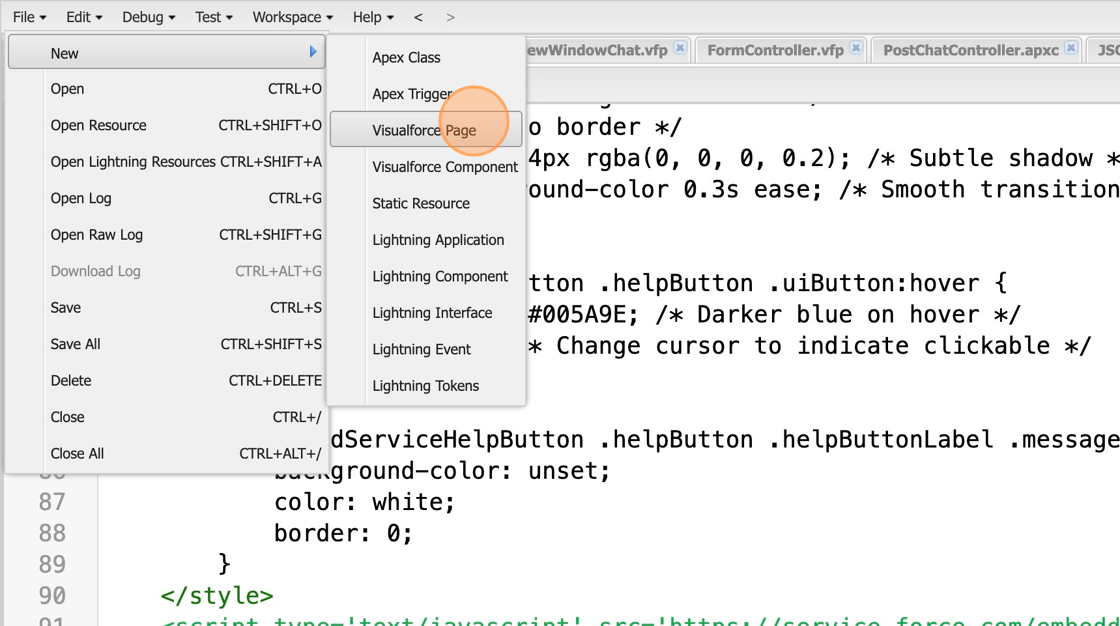
- Create a new visualforce page for chat preview "PreviewChat"
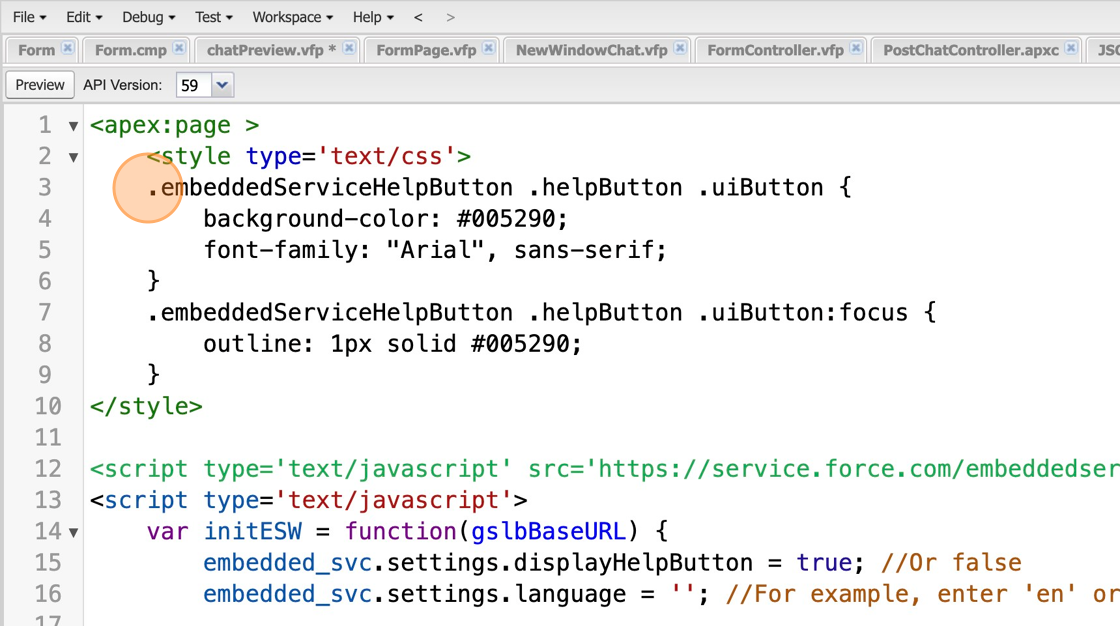
- Paste the copied code inside of <apex:page></apex:page>`
- Before the closing of
</script>tag add the the script to enable access to the microphone and camera. If the post-chat experience opens the page in a separate browser window/tab you can skip this step.
window.addEventListener('message', function(event) {
      // Check for the correct message and perform action
      if (event.data.action === 'updateIframeSrc') {
          var iframe = document.querySelector('.snapins_postChat');
          if (iframe) {
              iframe.setAttribute('allow', 'microphone; camera');
              iframe.src = event.data.url;
          }
      }
  }, false);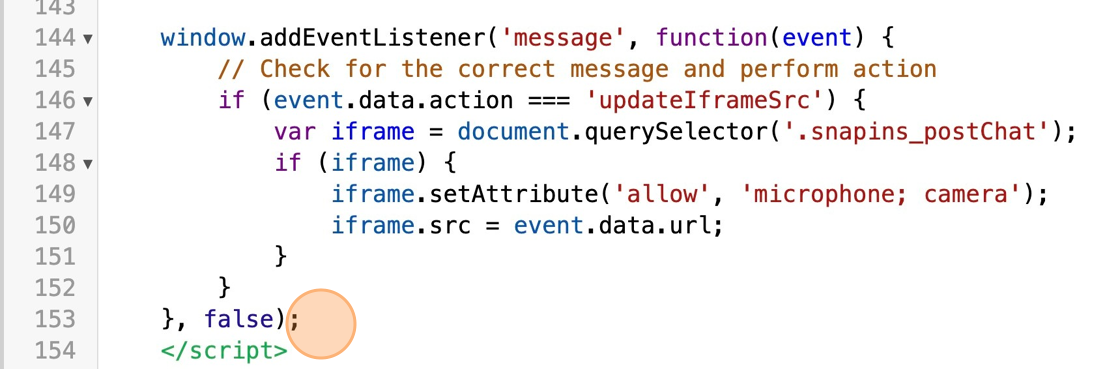
Preview the result
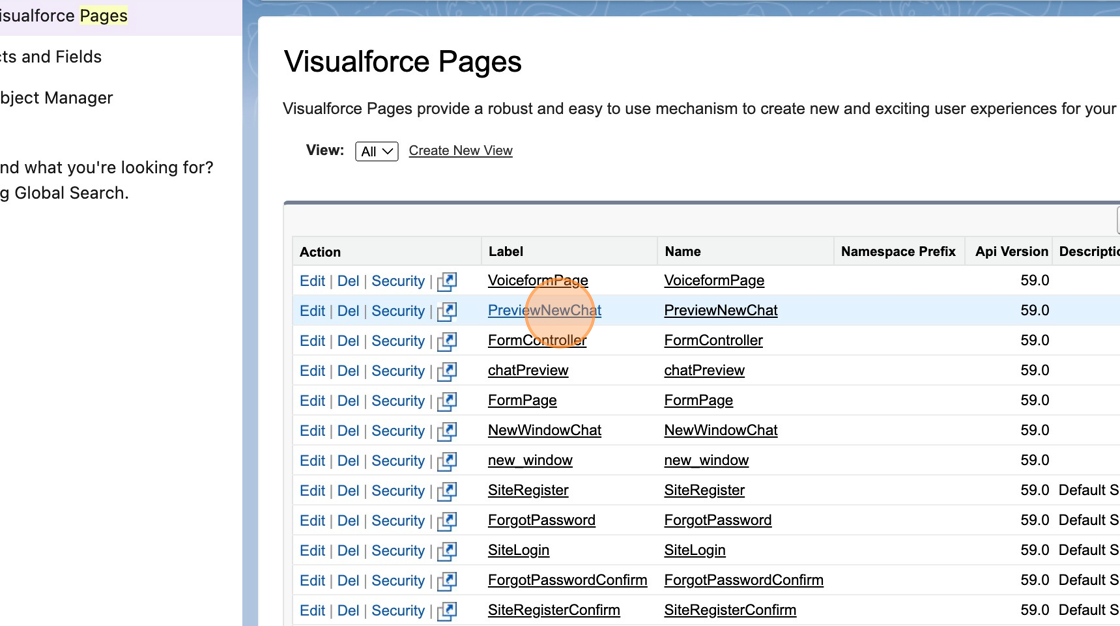
- Now its time to see the experience in action. Go to Service Setup and search for "Pages". Click on "Visualforce Pages"

- Find and click on the page where the chat button code was added. For this example it was "PreviewNewChat"
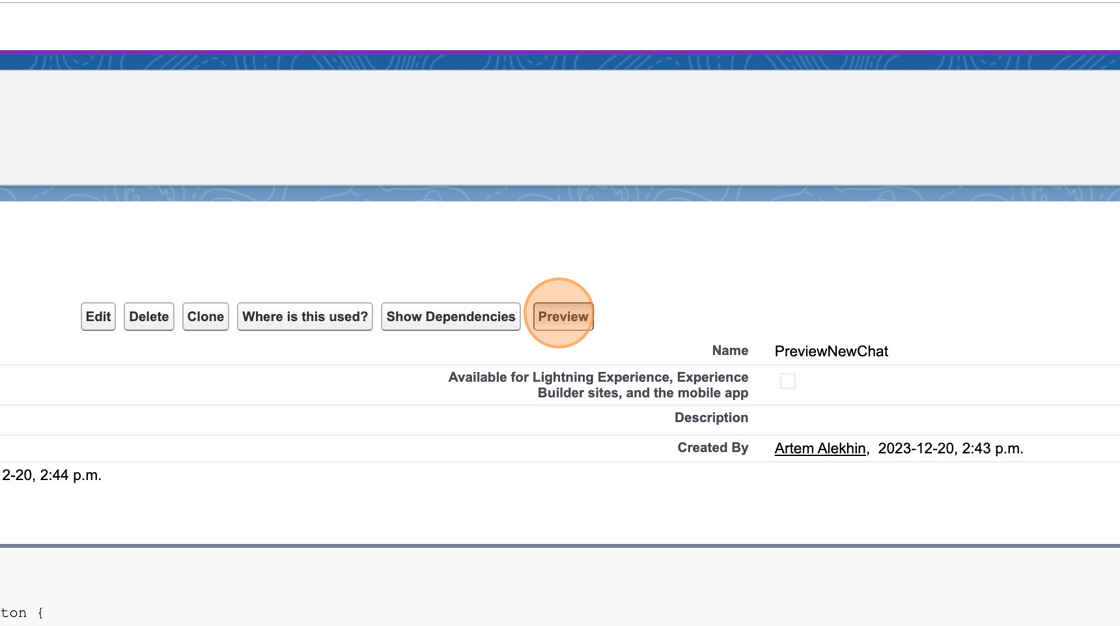
- Click "Preview".
- You should be able to see the page with the button at the bottom.

- After interacting with an agent and when chat is finished it should show such menu. Click "Give Feedback"
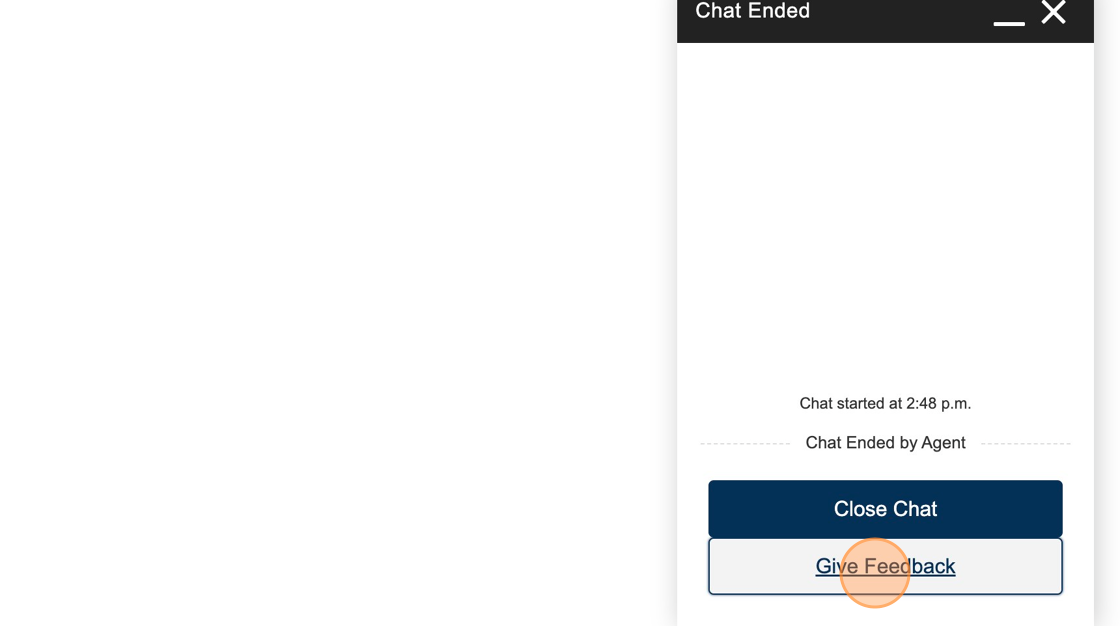
- Tada! Voiceform has been imbedded into the chat.

Updated about 1 year ago